Creating a ultramodern and eye- catching food flyer banner landing page has noway been easier. Thanks to Hostinger Website Builder, you can design a stunning website without writing a single line of code. All it takes is dragging and dropping elements on a blank page — and your website is ready to launch.
This step- by- step tutorial will guide you through the entire process, from buying hosting to designing your first food banner landing page website.
Get Your Hosting Plan
Although Hostinger’s website builder itself is free, you need hosting to use it. Visit this page and click on “Get 20% Discount” button and claim an extra 20% off. Once on the site, compare the available plans:
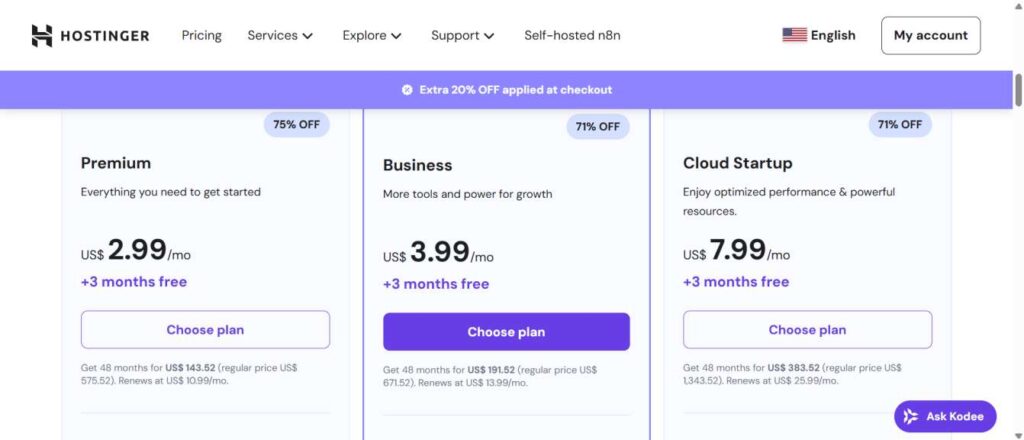
- Premium Plan – Ideal for small websites
- Business Plan – Best for growing projects
- Cloud Startup Plan – Suitable for fast, multi-site hosting
The main differences between these plans are speed, storage, and the number of hosted websites. If you select the 48-month plan, you’ll receive additional hosting time and bigger discounts. You’ll also get a free domain for one year. After choosing your plan, proceed to checkout. You can sign up using your email, Gmail, or GitHub and pay through PayPal, bank transfer, or cryptocurrency.
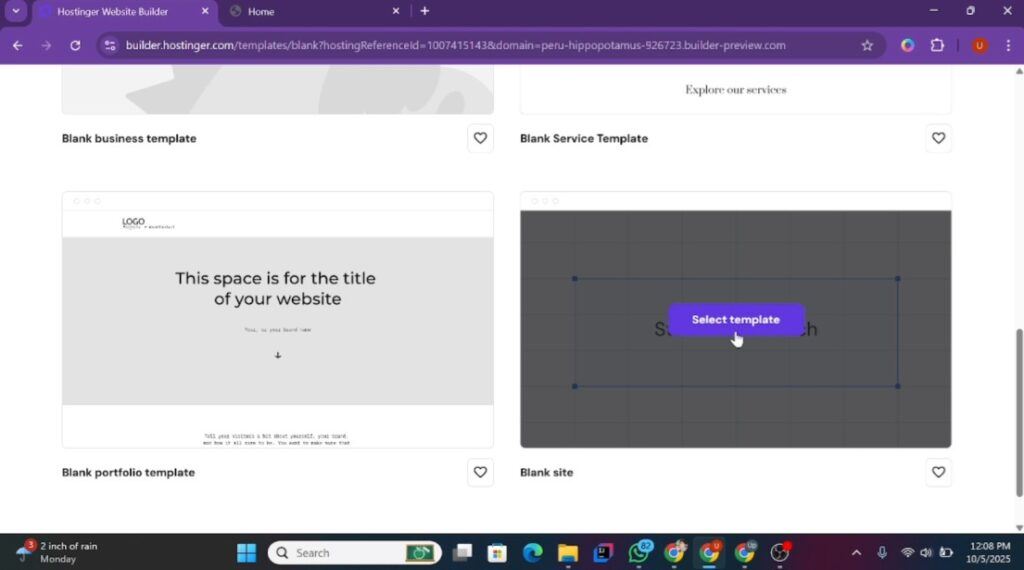
Access the Website Builder Dashboard
Once your hosting is active:
- Log in to your Hostinger account.
- Open the Websites tab.
- Click Add Website and select the Website Builder option.
You’ll land on a page where you can either use the AI website builder or start from a pre-made template. For this tutorial, we’ll build the site from scratch, so select the blank template.
Prepare Your Blank Canvas
After selecting the blank template, you’ll see a clean canvas. A hidden header section may appear if you hover over the top — keep it hidden since our food flyer design doesn’t need a header. Click Add Section and insert a blank section.
Edit the section background
- Go to Section Color → Gradient.
- Choose a light red tone for the first color and black for the second.
- Increase the container height to give your design more breathing room.
Add the Hero Text
Open the Elements tab and drag a Text element to the top of the page.
- Edit the text to say “Delicious Deal”.
- Center the alignment and change the text color to white.
- Upload a custom font (from the provided resource link) and apply it.
- Adjust the font size to 66px and change the color to a warm yellow tone.
For the subheading:
- Add another text element below the heading.
- Change the text to “Fresh and Healthy”.
- Center it, set the font to “Poppins Regular,” make the font size 24px, and color it white.
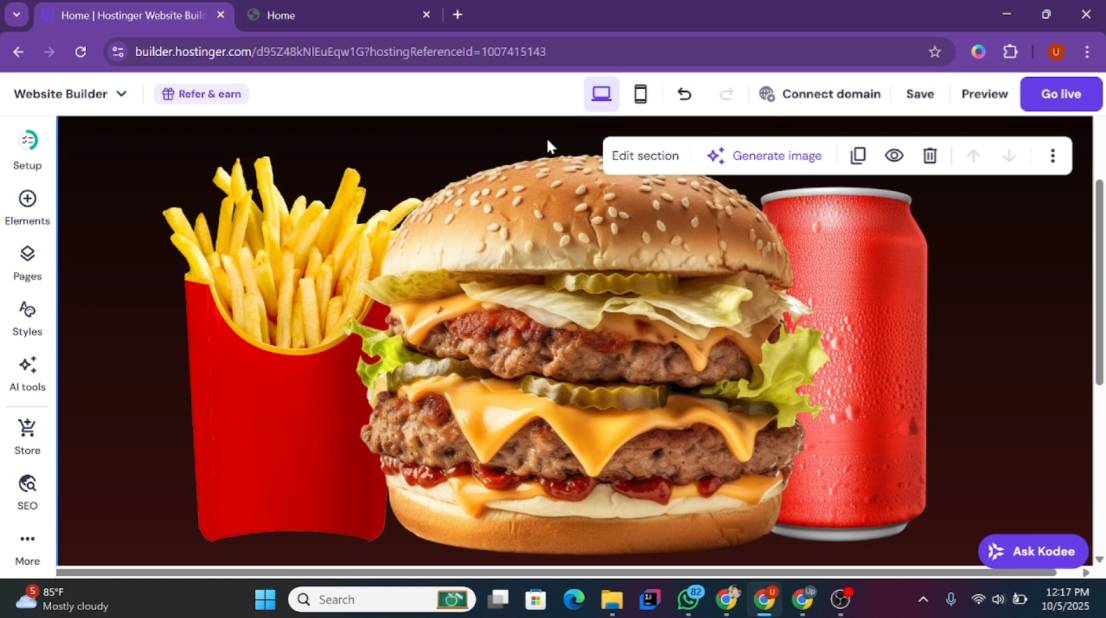
Insert the Product Images
Next, upload the main product image to make the flyer visually appealing:
- Drag an Image element below the subheading.
- Upload your images (e.g., burger, fries, cans, pizza, shawarma).
- Select the burger image for the hero spot.
- Adjust its size and position it at the center.
- Add another image element on the left → upload fries image → adjust and send to back.
- Add another image on the right → upload bottle image → adjust and send to back as well.
Add Animations for a Modern Look
Bring your design to life with subtle animations:
- For the fries image, select Slide Animation.
- For the bottle, choose Slide or Scale Animation.
- For the burger image, use the animation that best fits your layout (slide or fade works well).
Remember to save your progress frequently.
Create a Price Tag
- Add a Shape Element (round shape).
- Change the shape’s color to match the yellow heading.
- Resize it and position it near the main image.
- Drag a Text element over the shape, set the price (e.g., $35), and center it.
- Use the Poppins font for a clean and modern look.
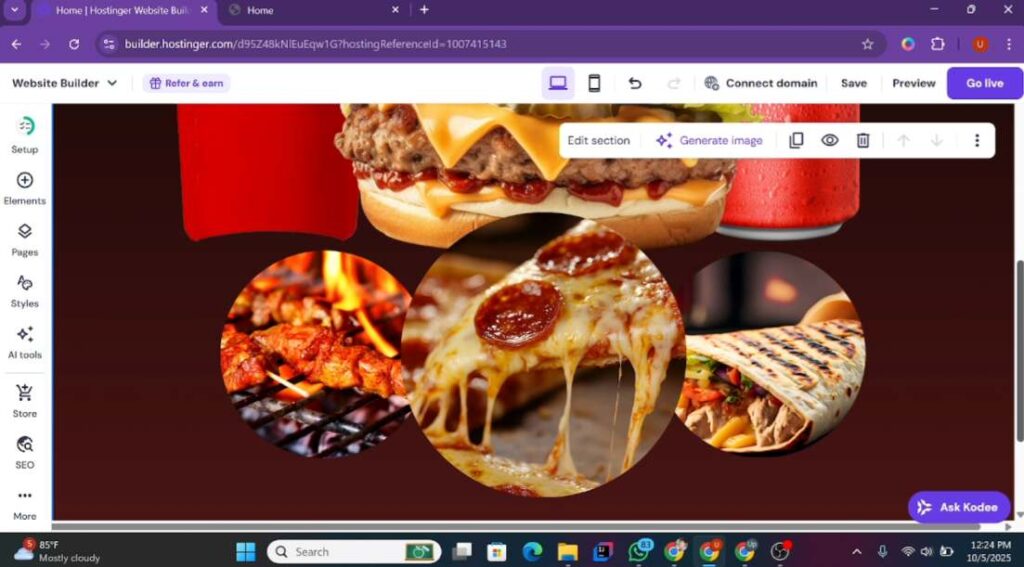
Add Supporting Food Images
For extra visual appeal:
- Add or duplicate an image element and upload the pizza image.
- Edit the image shape to circle.
- Adjust the container height and image size, then position it above the burger.
- Duplicate the element again:
- Replace the image with the shawarma.
- Resize and position it on the right side of the pizza image.
You now have a fully designed food flyer landing page featuring:
- A bold, attractive headline
- A delicious hero image
- Supporting visuals and animations
- A clear price tag
- A clean and modern layout
Once your design is ready, preview it on both desktop and mobile, make adjustments, and publish your landing page.
Pro Tips
- Keep the design minimal to make the food images stand out.
- Use matching color tones to create a cohesive look.
- Compress your images to ensure fast page loading.
Adjusting and Perfecting the Circular Images
When adding circular images, you may notice top or bottom edges appearing. This happens when the image proportions don’t match the container. To fix this:
- Slightly decrease the image size.
- Adjust the height until the circle shape looks perfect.
- Center the image carefully using the alignment guides.
- Once the first image looks right, duplicate it to maintain consistent sizing and spacing.
- Position the duplicate on the left side of the previous circular image.
- Align it using the center guidelines between both images.
- Replace the image with your barbecue photo.
Right-click each of these images and choose “Send Backward” to layer them behind the main image for a clean, balanced layout.
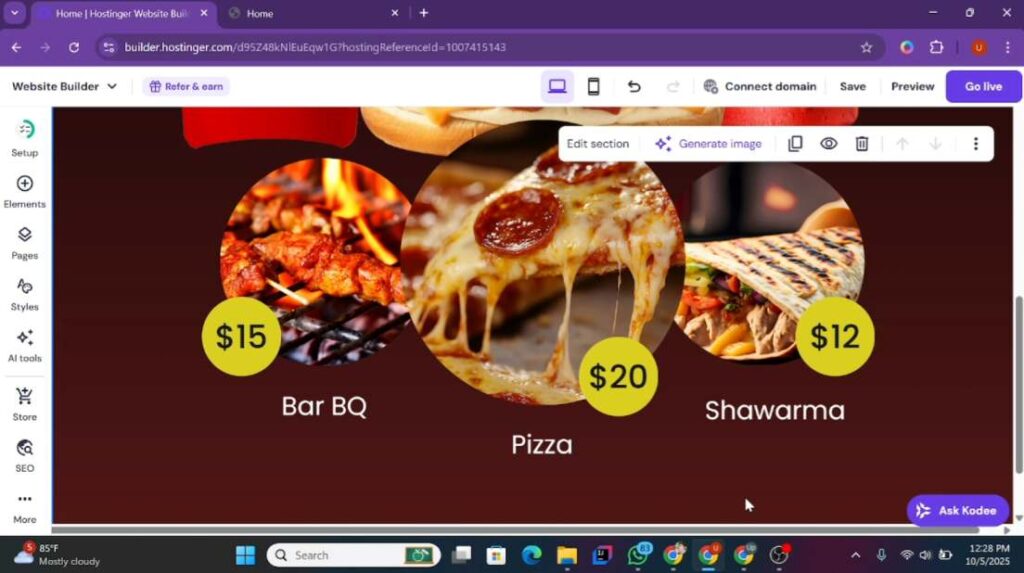
Adding Labels and Price Tags
To make each food item clear and visually appealing, add text labels under the images:
- Drag a Text element under the pizza image.
- Change the text to “Pizza”, center it, set the font to Poppins, color to white, and font size to 32px.
- Adjust the width and position it neatly.
- Duplicate this text element for other images:
- Under the second image → “Shawarma”
- Under the third image → “Barbecue”
Next, create the price tags:
- Add a Shape element and choose a circle.
- Change the shape color to yellow to match your main heading.
- Place it near the barbecue image (or wherever needed).
- Add a text element on top of the circle with the price (e.g., $15).
- Set the font to Poppins Medium, font size 40px, and center it perfectly.
- Duplicate this shape + price combo for the other items.
- Pizza price: $20
- Shawarma price: $12
This creates a neat and professional pricing section that draws the visitor’s eye.
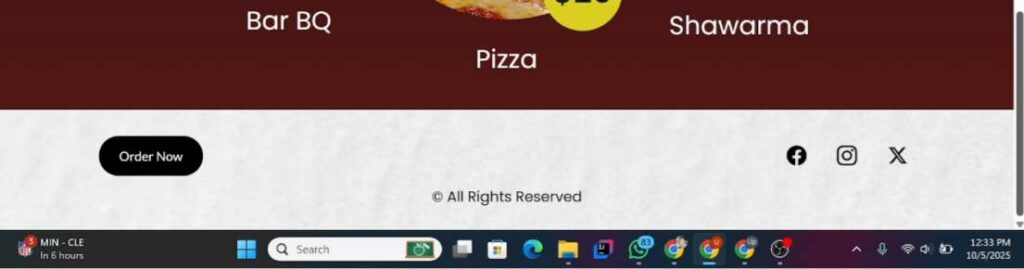
Adding a Footer Section
To give the landing page more visual variety:
- Add a new section and select a blank template.
- Go to Edit Section and choose an image background.
- Upload and select your desired background image.
- Reduce the container height to keep this section compact.
This background section will serve as a footer area for call-to-action elements and important links.
Designing the Footer & Call-to-Action Button
- A good landing page ends with a clear call to action. Here’s how to add yours:
- Add a Button element and position it in the center of the footer.
- Change the button text to “Order Now” or “Buy Now”.
- Set the border radius to 25 for a smooth, rounded look.
- Change the hover background to yellow and the text color to black for contrast.
This simple, bold button encourages immediate action from visitors.
Adding Social Media Icons
To connect visitors to your social pages:
- Add Social Media Icons below the button.
- Adjust the icon size to around 25px for good visibility.
- Align them horizontally to keep the footer clean.
- Edit each icon.
- Click the gear icon.
- Replace the default links with your actual social media URLs.
- Delete or reorder any icons you don’t need.
You can also adjust icon spacing or orientation to match your design.
Copyright Section
End your footer with a simple copyright note:
- Add a Text element at the bottom of the footer.
- Write something like:
“© 2025 YourBrand. All Rights Reserved.” - Center the text, set the font to Poppins Regular, and reduce the font size to 18px.
This adds a professional finishing touch to your page.
Final Adjustments & Going Live
Before publishing, make sure to:
- Align all footer elements (button, icons, copyright) to the center.
- Adjust container heights for balanced spacing.
- Review your images, fonts, and colors for consistency.
Once you’re satisfied:
- Click Save.
- Hit Go Live to publish your website.
- Preview your site on different screen sizes (desktop & mobile).
- If using a temporary domain, connect your free custom domain provided with your hosting plan.
Congratulations — your food flyer landing page is live! It includes:
- A bold hero section
- Beautifully layered circular images
- Eye-catching price tags
- A clean call-to-action footer
- Social links and copyright notice
This layout not only looks professional but also helps convert visitors into customers. And the best part? You created it all without writing a single line of code, thanks to Hostinger Website Builder.