
So you’ve bought your hosting from Hostinger, but your domain is sitting over at GoDaddy. Now you’re wondering how to bring the two together so your website actually shows up under your own domain name instead of that temporary Hostinger link.
Good news — it’s a pretty simple process once you know where to click. In this guide, I’ll walk you through exactly how I connected my GoDaddy domain to my Hostinger hosting, step by step, so you can do the same without any guesswork. Let’s get into it.
Step 1: Start From Your Hostinger Dashboard
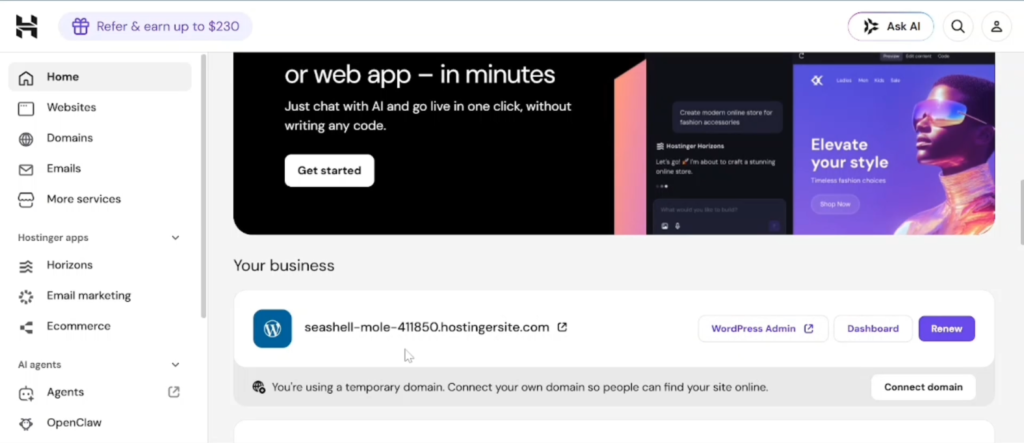
When you first set up hosting with Hostinger, it automatically assigns your website a temporary domain. That’s fine for testing, but obviously you’ll want your real domain — the one you bought on GoDaddy — connected instead.
Get 20% discount on your web hosting plan.
To do this, head over to your Hostinger dashboard and look for the “Connect Domain” button. Click on it, and you’ll be asked to enter the domain you want to connect.
Step 2: Copy Your Domain From GoDaddy
Open a new tab and log into your GoDaddy account. Go to My Products, find your domain, and copy it exactly as it appears.
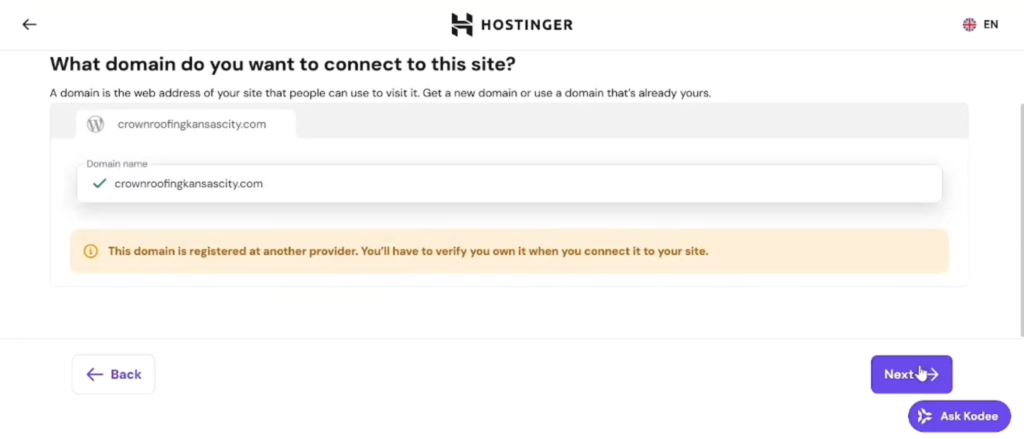
Now switch back to Hostinger and paste that domain into the search bar. Hostinger will show you a few suggestions, and your exact domain should appear in the list too.
Select the option that says something like “Do you own this domain? Use it,” and you’ll also notice a note confirming that the domain is currently registered with another provider (in this case, GoDaddy). That’s expected — click Next.
Step 3: Choose How You Want to Connect the Domain
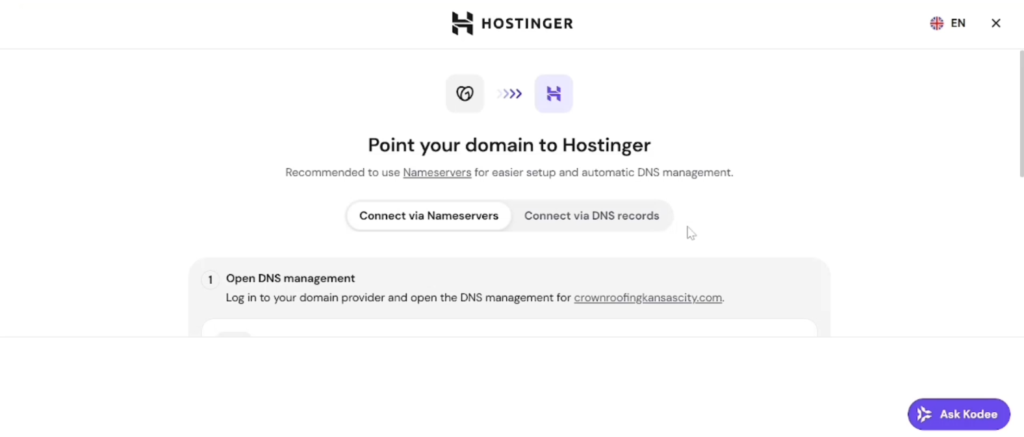
Once your domain is added to your Hostinger account, you’ll be prompted to redirect your DNS. Click Continue, and then select Check Guide to see your connection options.
You’ll typically see two methods:
- Connecting via Nameservers
- Connecting via DNS Records
Using nameservers is the easier and more reliable option, so that’s the one I recommend and the one I’ll show you here.
Step 4: Update Your Nameservers on GoDaddy
Hostinger will give you two nameserver addresses. Copy the first one, then go back to your GoDaddy account.
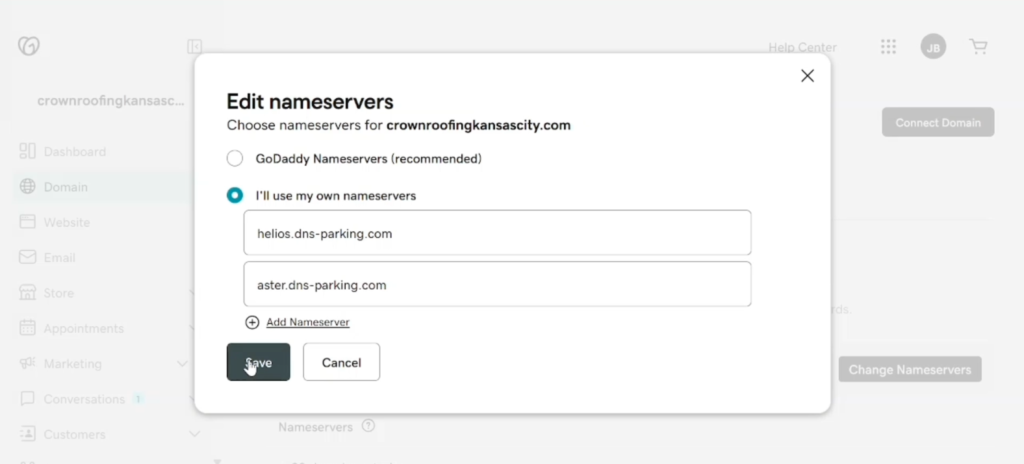
Here’s the important part: you need to update your nameservers, not your DNS records — they’re different settings, so don’t mix them up.
Also read: How Hostinger Website Builder create a website under 5 minutes
In GoDaddy:
- Go to your domain settings.
- Click on DNS.
- Look for the Nameservers section (usually the third option).
- Click Change Nameservers.
- Select “I’ll use my own nameservers.”
- Paste the first nameserver from Hostinger.
- Go back to Hostinger, copy the second nameserver, return to GoDaddy, and paste it in the second field.
- Click Save.
Step 5: Verify Your Domain Ownership
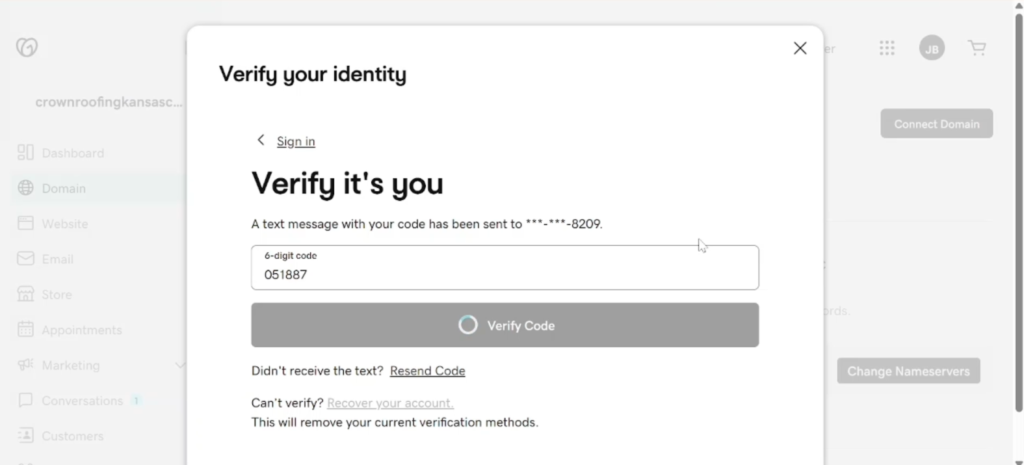
After saving your nameservers, Hostinger will ask you to verify ownership. Click Continue and Verify, then choose to verify your identity.
You’ll receive an OTP (One-Time Password) either by phone number or email — enter that code where prompted, then click Verify Code.
Once verified, Hostinger will confirm your identity and begin redirecting your nameservers. You’ll see a message saying something like “Your request is in progress.” Just click Refresh, and it will move forward with connecting your domain.
Step 6: Confirm the Update and Wait for Propagation
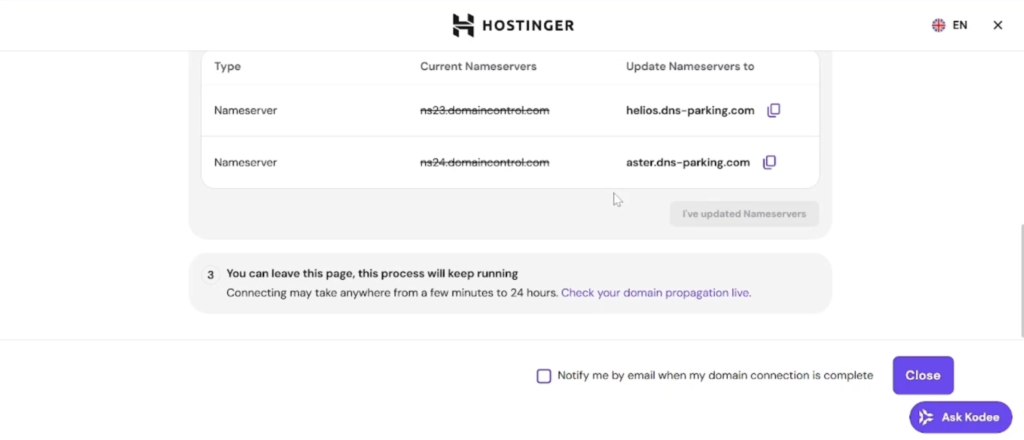
Back on Hostinger, you’ll see an option confirming that you’ve updated your nameservers. Click it, and then choose “Notify me by email when my domain connection is completed.”
This part is important: domain connection through nameserver changes can take up to 24 hours to fully propagate. This is normal — DNS changes don’t happen instantly across the internet, so a bit of patience is required here.
Once you close this step, you’ll notice your domain status on Hostinger shows “Domain is connecting,” along with a Check Guide button in case you need to reference the steps again.
Step 7: Check If Your Domain Is Live
After waiting out the propagation period (again, up to 24 hours), go back to your Hostinger dashboard and check your domain status.
In my case, the domain successfully connected, and when I opened it, it loaded the website I’d built for my client — exactly as expected, now running on my own domain instead of the temporary Hostinger URL.
Final Thoughts
And that’s really all there is to it. Connecting a GoDaddy domain to Hostinger comes down to three main things:
- Adding your domain inside Hostinger.
- Updating your nameservers on GoDaddy (not your DNS records).
- Verifying your identity and waiting for propagation.
Once that’s done, your website will be live on your actual domain name, ready to share with clients, customers, or your audience.
Frequently Asked Questions
How long does it take to connect a GoDaddy domain to Hostinger?
It can take up to 24 hours for the nameserver changes to fully propagate, though it sometimes happens faster.
Should I change my nameservers or DNS records?
For most users, updating the nameservers is the simpler and more reliable method compared to editing individual DNS records.
Will I need to verify my identity during the process?
Yes, Hostinger will ask you to verify ownership using an OTP sent to your phone number or email address.
What happens to my old temporary Hostinger domain?
Once your real domain is connected, your temporary Hostinger domain is simply replaced — your website will load under your new domain instead.