A professional business email address (e.g., support@yourdomain.com) builds trust, strengthens your brand identity, and improves credibility with clients. If your domain is hosted on Hostinger, you can claim a free business email directly from your dashboard.
In this guide, you’ll learn how to create a free business email on Hostinger, step by step.
Requirements Before You Start
Before claiming your free email on Hostinger, make sure:
- Your domain is registered on Hostinger
- You have a working website connected to that domain
- You have access to your Hostinger account dashboard
Important: Hostinger only allows you to claim a free business email for domains that already have an active website.
Step 1: Log in to Your Hostinger Account
Go to the Hostinger website and log in to your dashboard.
Once logged in:
- Navigate to the Email section.
- Click on “Claim your free email.”
Also read: How To Transfer Domain From Hostinger To Hostinger
Step 2: Select Your Domain
After clicking the claim button:
- Click “Select Domain.”
- You will see a list of domains available in your account.
If you select a domain without an active website, Hostinger will prompt you to create one first.
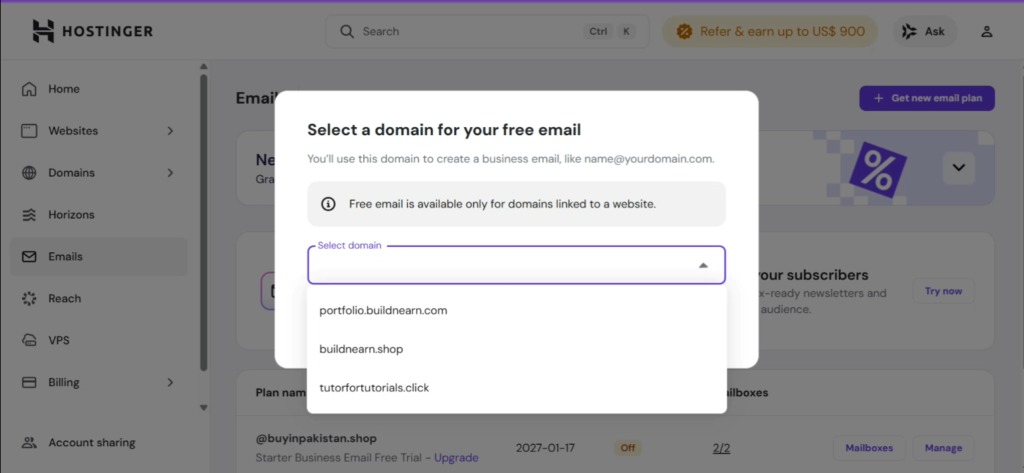
To proceed:
- Choose a domain that already has a live website connected.
- Click Confirm.
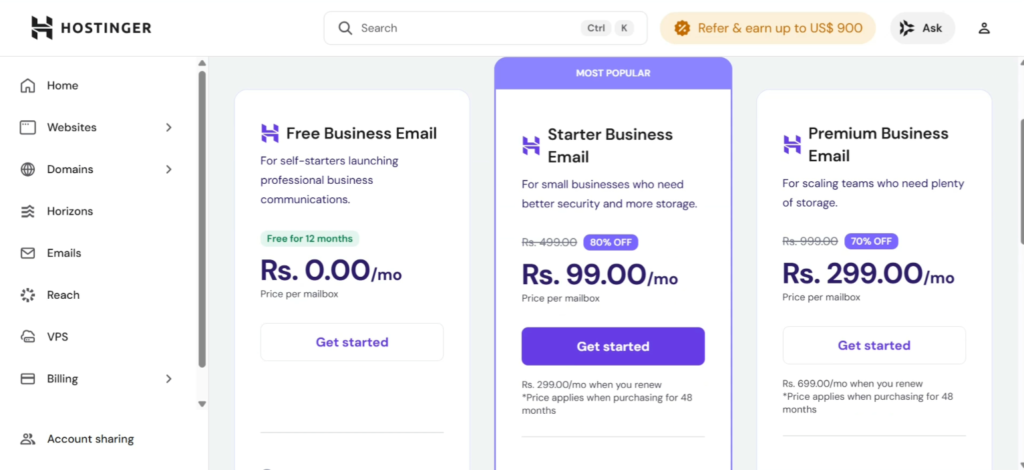
Step 3: Choose the Free Business Email Plan
Hostinger will now ask you to select a plan.
You’ll see options such as:
- Free Business Email ($0/month)
- Premium email plans
To create a free email:
- Select the Free Business Email plan
- Click Get Started
- Choose your payment method (even though the plan is free, confirmation is required)
Step 4: Set Up Your Mailbox
Now it’s time to create your custom email address.
You will need to:
- Enter your desired email name (e.g.,
support,contact,info) - Create a strong password
Your email will look like support@yourwebsite.com
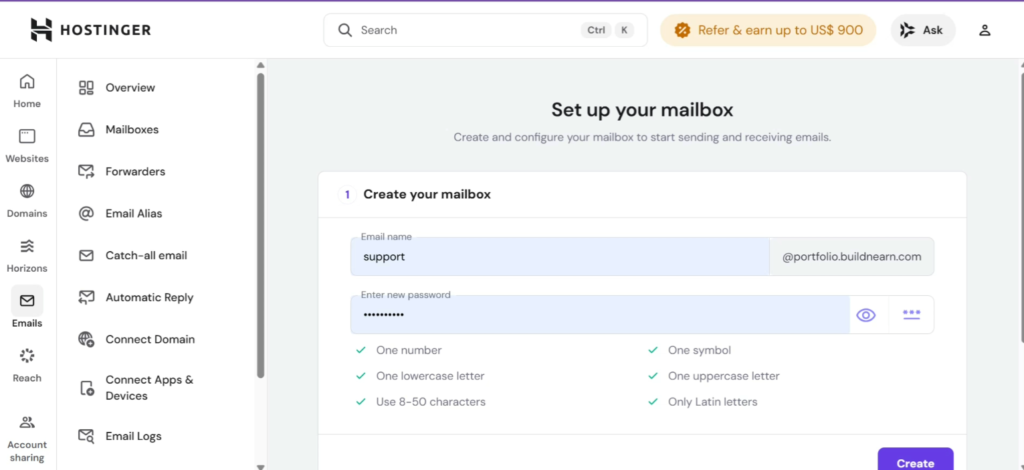
After entering the details:
- Click Create
- Wait a few moments for the mailbox to be generated
- Click Complete
Your free business email is now successfully created.
Visit: Get 20% discount on your hosting plan
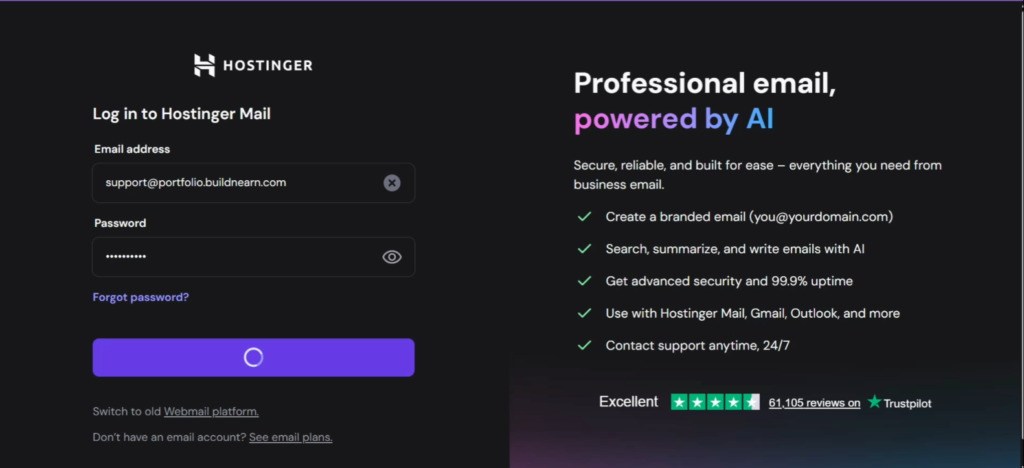
Step 5: Access Your Hostinger Webmail
To open your newly created email:
- Scroll down in your dashboard
- Click the Hostinger Webmail icon
- Enter your email address and password
- Click Login
You will now be inside your Hostinger email inbox.
Can You Use This Email with Gmail or Outlook?
Yes. You can configure your Hostinger business email with:
- Gmail
- Microsoft Outlook
- Any email client that supports IMAP/POP
Simply use the same credentials you created during setup.
Why Use a Business Email Instead of Gmail?
A business email address:
- Builds trust with customers
- Makes your brand look professional
- Increases response rates
- Strengthens brand identity
- Improves deliverability compared to generic email accounts
For example:
- Non Professional: username123@gmail.com
- Professional: support@yourdomain.com
The second option clearly looks more credible.
Final Thoughts
Creating a free business email on Hostinger is simple and only takes a few minutes — as long as your domain has an active website connected.
By following the steps above, you can quickly set up a professional email address that enhances your business credibility and branding.
If you are building websites for clients or running your own online business, this is an essential step you should never skip.