If you want someone to help manage your website or build a site using your hosting, learning how to share your Hostinger account access is essential. In this guide, I’ll walk you through the exact steps to safely give access to your Hostinger account — whether you’re working with a freelancer, developer, or team member.
Why Share Hostinger Access?
There are several reasons you might want to grant access to your Hostinger account:
- Hire a developer to build your website
- Let a freelancer manage your hosting or DNS
- Give a team member access to emails or domains
- Collaborate without sharing your password
The best part? You can control exactly what they can access.
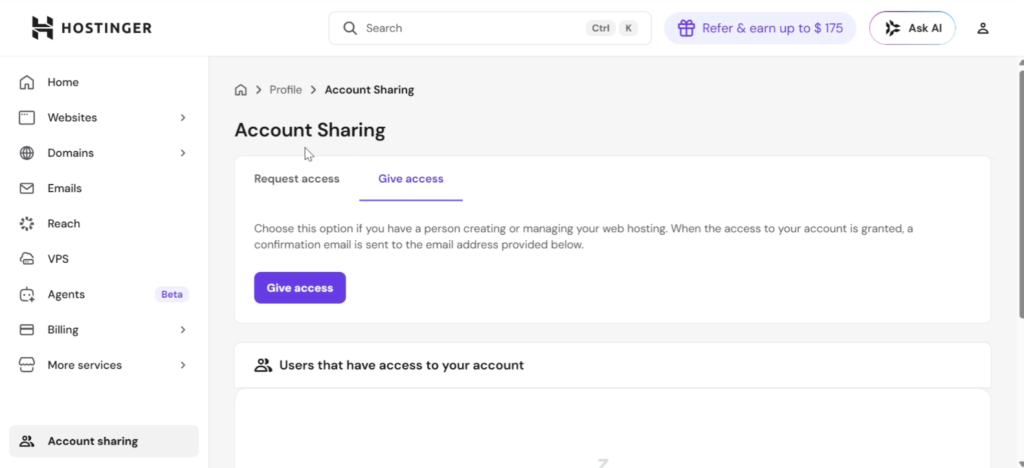
Step 1: Go to Account Sharing
- Log in to your Hostinger account
- Navigate to the Account Sharing section
- Click “Give Access”
If you’re a freelancer, you can also request access from a client here.
Step 2: Add the User’s Email
- Enter the email address of the person you want to give access to
- Double-check the email to avoid sending access to the wrong person
Also read: How to Get a Free Business Email with Your Domain on Hostinger
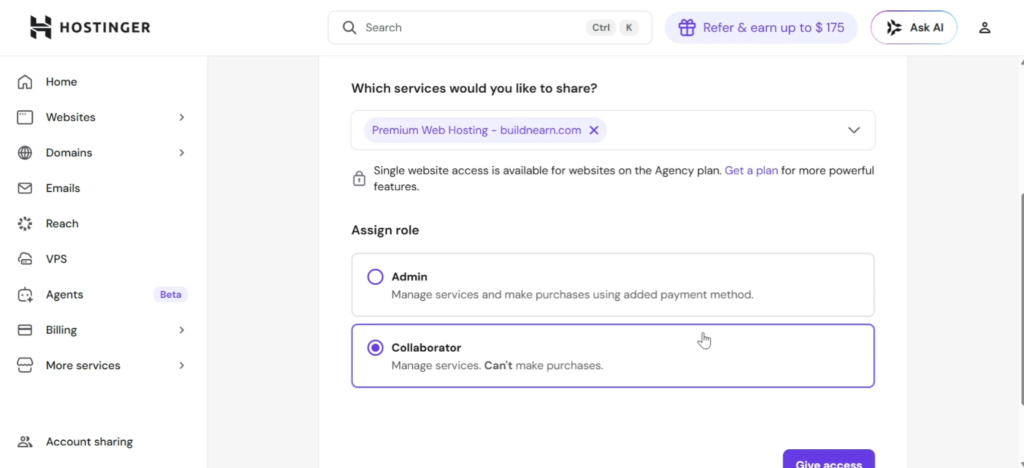
Step 3: Choose What to Share
You’ll now select which services they can access. Options include:
- Domain access (DNS & nameservers)
- Web hosting (for building/managing websites)
- Email services
- Other Hostinger tools (like Website Builder or Horizon)
Example:
If you want someone to build your website, select Premium Web Hosting.
Step 4: Select the Right Role (IMPORTANT)
You’ll need to choose a role:
Admin Access
- Full control over your account
- Can make purchases using your saved payment method
Warning: Only give this to someone you fully trust.
Collaborator Access (Recommended)
- Can manage services
- Cannot make payments or major account changes
Best practice: Always choose Collaborator for freelancers or agencies.
Step 5: Confirm with 2FA
- Hostinger will send a 2FA (verification code) to your email
- Enter the code
- Click Confirm
Once done, the invitation will be sent to the user.
Get 20% discount on your hosting plan
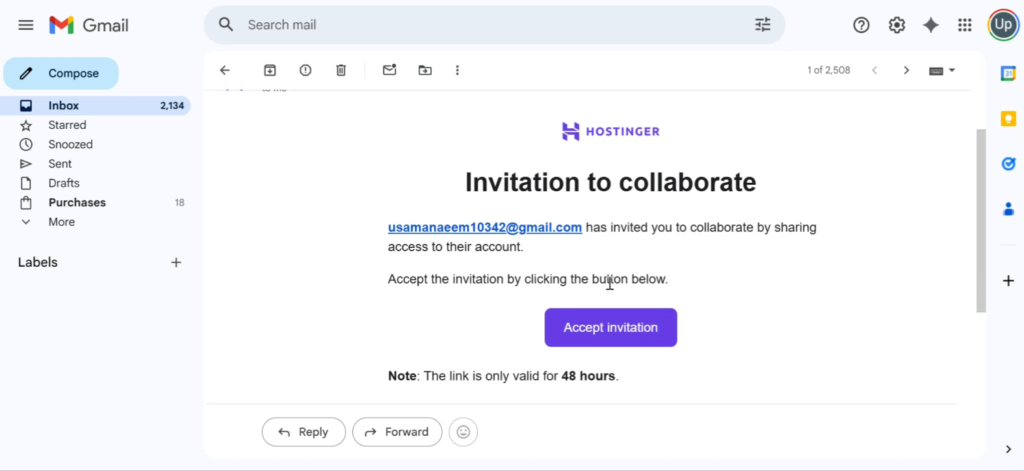
Step 6: Accept the Invitation (Receiver Side)
The person you invited must:
- Open their email
- Click “Accept Invitation”
- Log in to their Hostinger account
After that, they’ll gain access to the shared services.
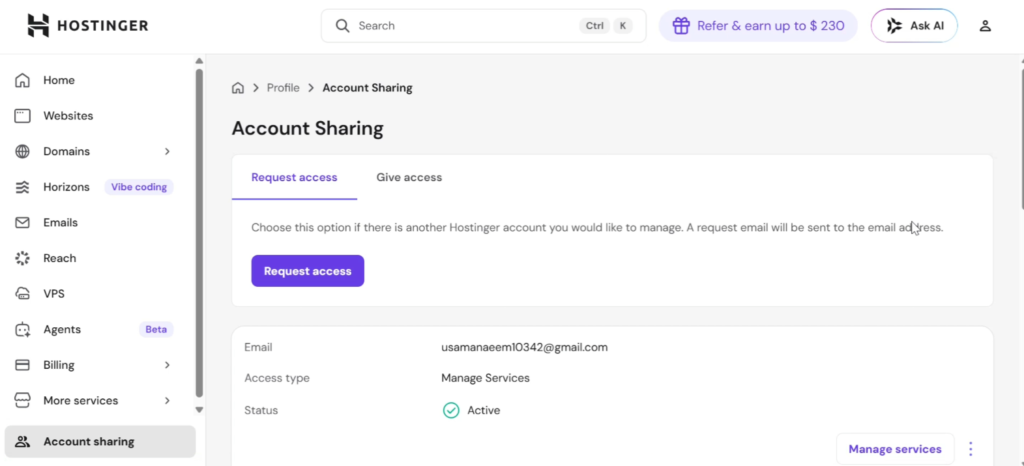
Step 7: Managing the Account
Once access is active:
- The user can go to Account Sharing → Manage Services
- They’ll be able to:
- View websites
- Manage domains
- Work on hosting services
You’ll also see the status change to Active in your account.
Important Security Tip
After your project is complete:
Remove access immediately
This prevents:
- Unauthorized changes
- Security risks
- Accidental edits after your contract ends
Final Thoughts
Sharing your Hostinger account is a simple and powerful way to collaborate without compromising security — as long as you assign the right permissions.
Always:
- Double-check emails
- Use Collaborator access
- Remove access when done
Need Help?
If you found this guide helpful, feel free to share it with others who might need it.