In this guide, I’ll walk you through exactly how to connect your Blogger website to a custom domain. It doesn’t matter where your domain is registered—whether it’s Hostinger, GoDaddy, Namecheap, or any other provider. This method works the same for all platforms and for any domain extension like .com, .net, .xyz, and more.
Step 1: Check Your Current Blogger URL
First, open your Blogger dashboard and click on “View Blog.”
You’ll notice that your website is currently using a free Blogger URL (something like yourblog.blogspot.com).
Our goal is to replace this with a custom domain.
Step 2: Open Your Domain Provider
Now, log in to your domain provider. In this example, I’m using Hostinger.
- Go to Domains
- Open your Domain Portfolio
- Select the domain you want to connect
- Click Manage
Next, go to the DNS / Name Servers section.
Also read: How To Share Hostinger Account Access
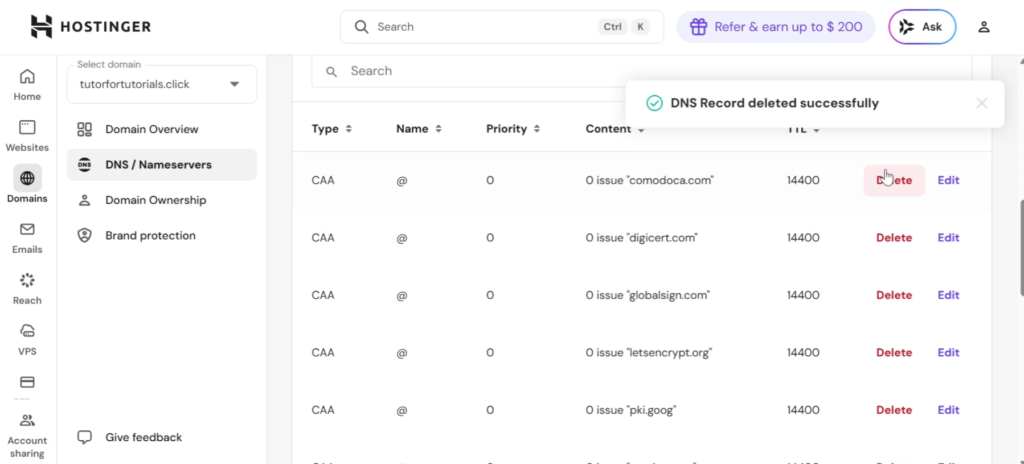
Step 3: Clear Existing DNS Records
Before connecting your domain:
- Delete all existing DNS records
- Make sure everything is cleared
Tip: If you make a mistake, you can always click “Reset DNS” to restore default settings.
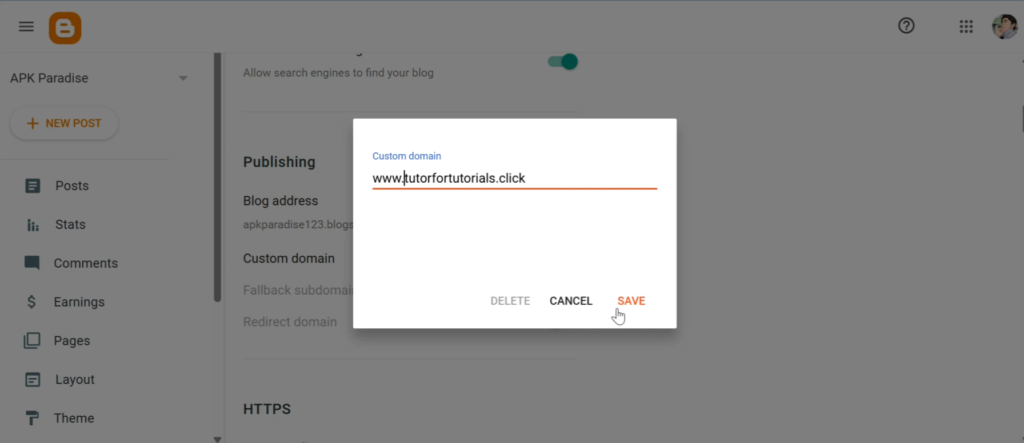
Step 4: Add Your Custom Domain in Blogger
Now go back to your Blogger dashboard:
- Navigate to Settings
- Scroll down to Custom Domain
- Enter your domain (with
wwwin front)
Example:
www.yourdomain.com
Click Save
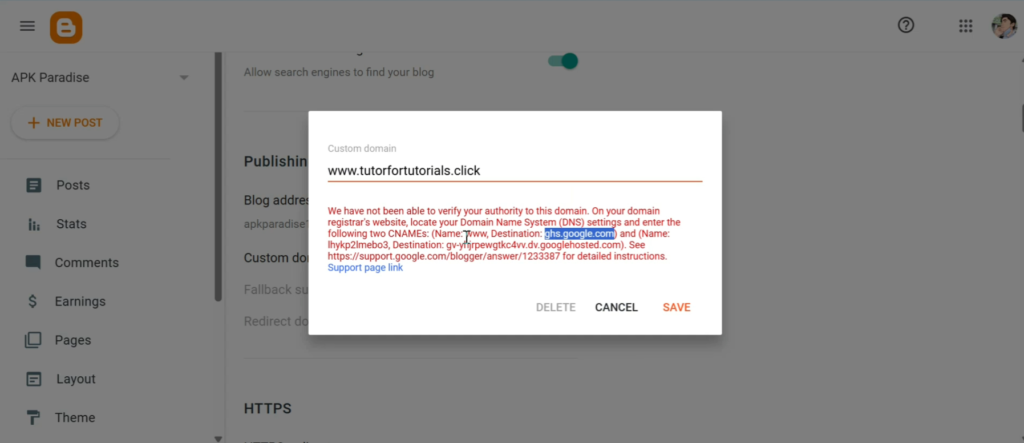
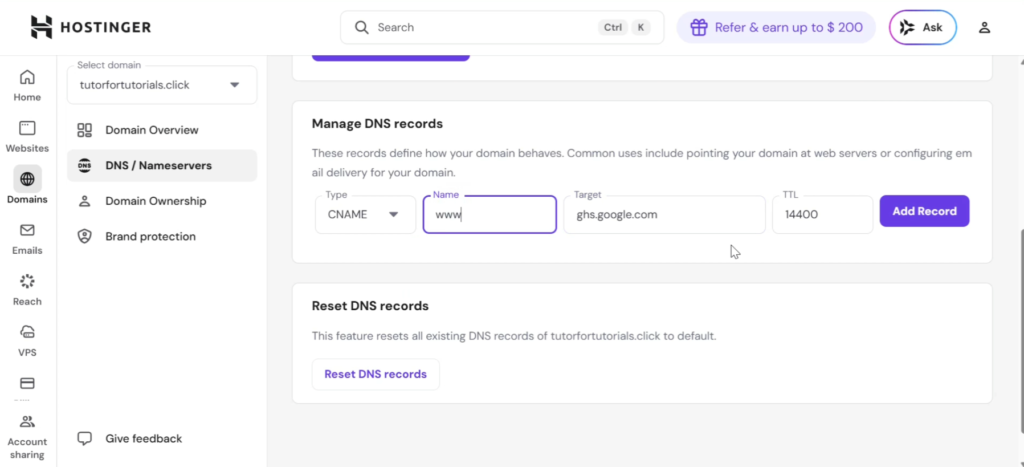
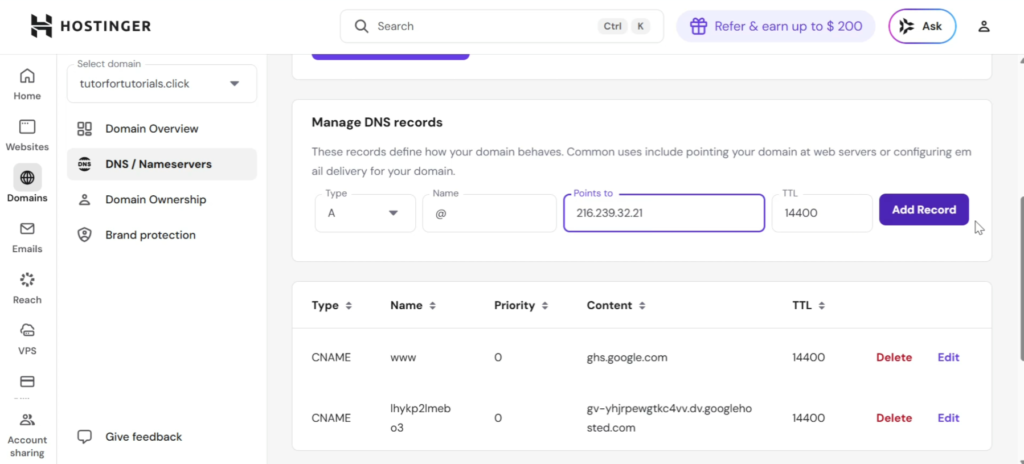
Step 5: Add CNAME Records
After saving, Blogger will provide you with two CNAME records.
First CNAME:
- Name: www
- Target: ghs.google.com
Second CNAME:
- Copy both the Name and Target provided by Blogger
Now go back to your DNS settings and:
- Select CNAME
- Add both records exactly as shown
- Keep TTL as default
Get 20% discount on your hosting plan.
Step 6: Add A Records
Next, you need to add four A records.
In your DNS settings:
- Select A Record
- Leave the Name field blank (or use
@) - Add the following IP addresses one by one:
216.239.32.21
216.239.34.21
216.239.36.21
216.239.38.21
Click Add Record for each one.
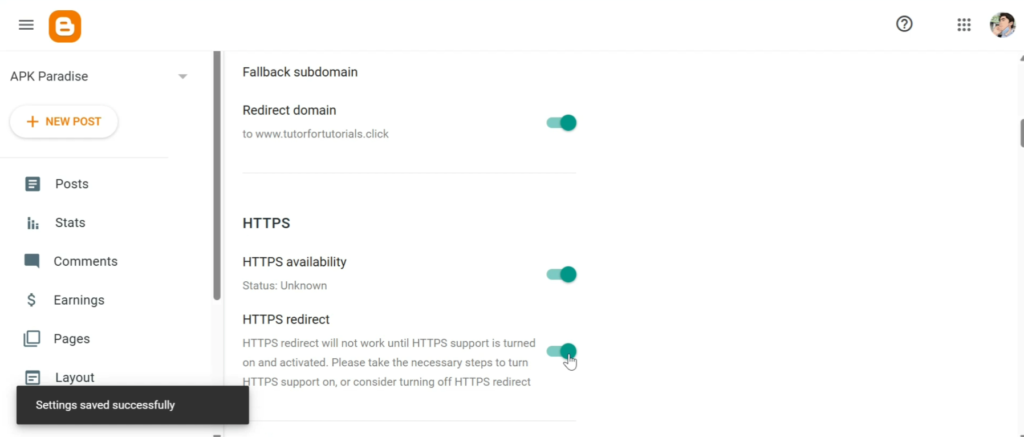
Step 7: Save and Enable HTTPS
Go back to Blogger:
- Click Save
- Enable:
- Redirect domain
- HTTPS
- HTTPS redirect
Make sure all options are turned ON.
Step 8: Wait for DNS Propagation
After saving everything, your site may not load immediately.
You might see:
“This site can’t be reached”
That’s normal. Wait 1–2 hours for DNS changes to propagate (sometimes it can be faster).
Step 9: Verify Your Website
After some time:
- Refresh your website
- Your Blogger site should now load on your custom domain
You can also confirm this from your Blogger dashboard by clicking “View Blog.”
Final Thoughts
That’s it! You’ve successfully connected your Blogger website to a custom domain.
This method works for any domain provider and is one of the easiest ways to make your blog look more professional and brand-ready.
If This Helped You:
- Share this guide
- Bookmark it for later
- And keep building