If you’ve just created your Shopify store, you’ve probably noticed it comes with a default domain (something like yourstore.myshopify.com). While that works, it doesn’t look professional or build trust with customers.
In this guide, I’ll show you exactly how to connect a custom domain to your Shopify store—no matter where your domain is hosted. Whether you’re using Hostinger, Namecheap, GoDaddy, or any other provider, the process is nearly the same. Let’s get started.
Why Use a Custom Domain?
Before we dive in, here’s why switching to a custom domain is important:
- Builds trust and credibility
- Makes your brand look more professional
- Easier for customers to remember
- Helps with SEO and branding
Step 1: Check Your Current Shopify Domain
First, log in to your Shopify store and open your website.
You’ll see that your store is currently using a free Shopify domain (e.g., yourstore.myshopify.com). This is what we’re going to replace with your custom domain.
Also Read: How to Connect a Blogger Website to a Custom Domain
Step 2: Go to Shopify Domain Settings
Inside your Shopify dashboard:
- Click on Settings
- Navigate to Domains
- Click on Connect existing domain
This is where you’ll link your custom domain.
Step 3: Enter Your Custom Domain
Now, go to your domain provider (for example, Hostinger).
- Open your Domain Portfolio
- Select the domain you want to connect
- Copy your domain name
Go back to Shopify, paste the domain into the field, and click Next.
At this point, Shopify will add the domain—but you’re not done yet.
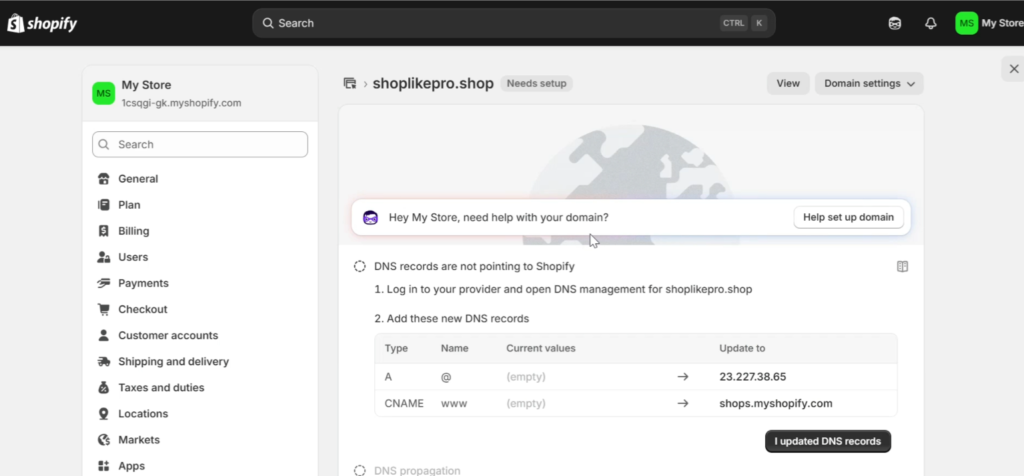
Step 4: Update DNS Records
After adding your domain, Shopify will show a message like “DNS records are not yet connected.”
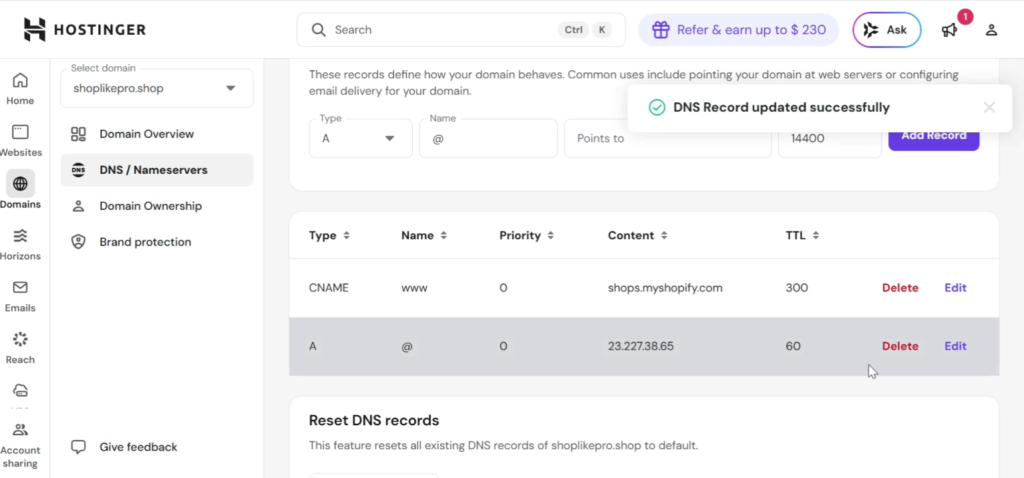
To fix this, you need to update your DNS settings from your domain provider.
Update the A Record:
- Go to your domain’s DNS settings
- Find the A Record
- Edit it and paste the value provided by Shopify
- Set the TTL (Time To Live) to 60 seconds if needed
- Save the changes
Get 20% discount on your hosting plan.
Update the CNAME Record:
- Find the CNAME record
- Replace the target value with the one provided by Shopify
- Save the changes
If you’ve connected domains before and see multiple records, it’s best to clean up or reset them to avoid conflicts.
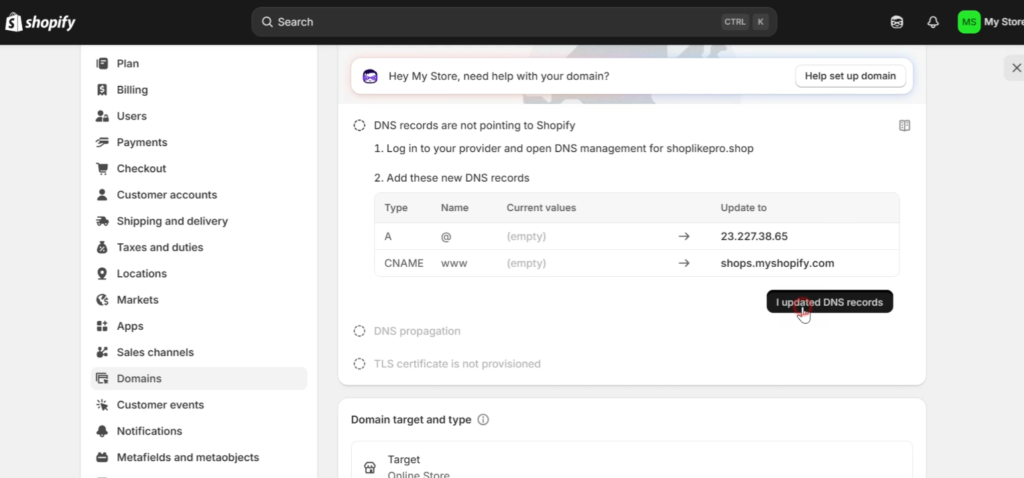
Step 5: Verify Connection in Shopify
Once your DNS records are updated:
- Go back to Shopify
- Click “I updated DNS records”
- Wait a few moments
Shopify will verify the connection. This usually takes a few seconds, but in some cases, it may take a bit longer.
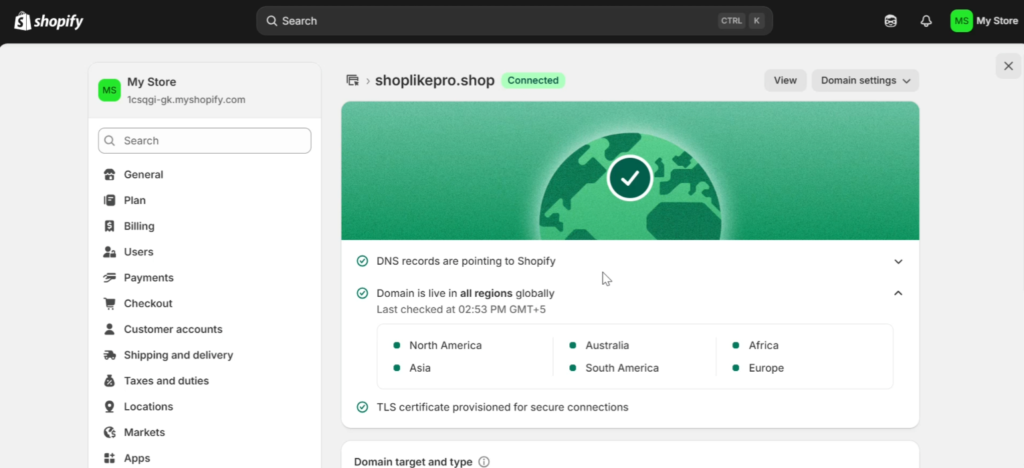
Step 6: Wait for SSL Certificate Activation
After your domain connects, Shopify will automatically generate an SSL certificate (for secure HTTPS connection).
- This typically takes around 5 minutes
- Once done, your domain will be fully secure and live
Step 7: Test Your Domain
Now, open your custom domain in your browser.
If your store is password-protected (which happens if you’re on a trial plan), you may see a “Coming Soon” page. That’s completely normal.
The important thing is—your domain is now successfully connected to Shopify.
Final Thoughts
That’s it! You’ve successfully linked your custom domain to your Shopify store.
This process works for all domain providers and extensions, whether it’s:
- .com
- .net
- .shop
- .online
- or any other domain
Once your domain is connected, your store will look more professional and be ready to grow your brand.
If this guide helped you, consider sharing it with others who are setting up their Shopify store.
Thanks for sharing such a pleasant thought, post is fastidious, thats why
i have read it entirely