

Webflow is one of the most powerful ways to build a website without writing code — but building a site page by page still takes time. Now there is a faster way: Claude’s official Webflow connector lets you describe what you want in plain words, and Claude builds it directly inside your Webflow site.
In this guide, you will learn how to connect Claude to Webflow, authorize your site, and get Claude to add a real section to your project — all on the free plans of both tools. No API key, no code, and no paid subscription needed.
What you need before you start
You only need two free accounts:
- A Claude account — free works. You can use claude.ai in the browser or the Claude Desktop app.
- A Webflow account — the free Starter site plan works. You need at least one site in your account, and a site role other than Reviewer (Reviewers cannot connect).
- A few minutes — the whole setup takes about five minutes.
That is it. The connection uses Webflow’s official MCP server, which runs remotely and signs you in with OAuth, so there is no API key to create or paste anywhere.
Step 1: Add the Webflow connector in Claude
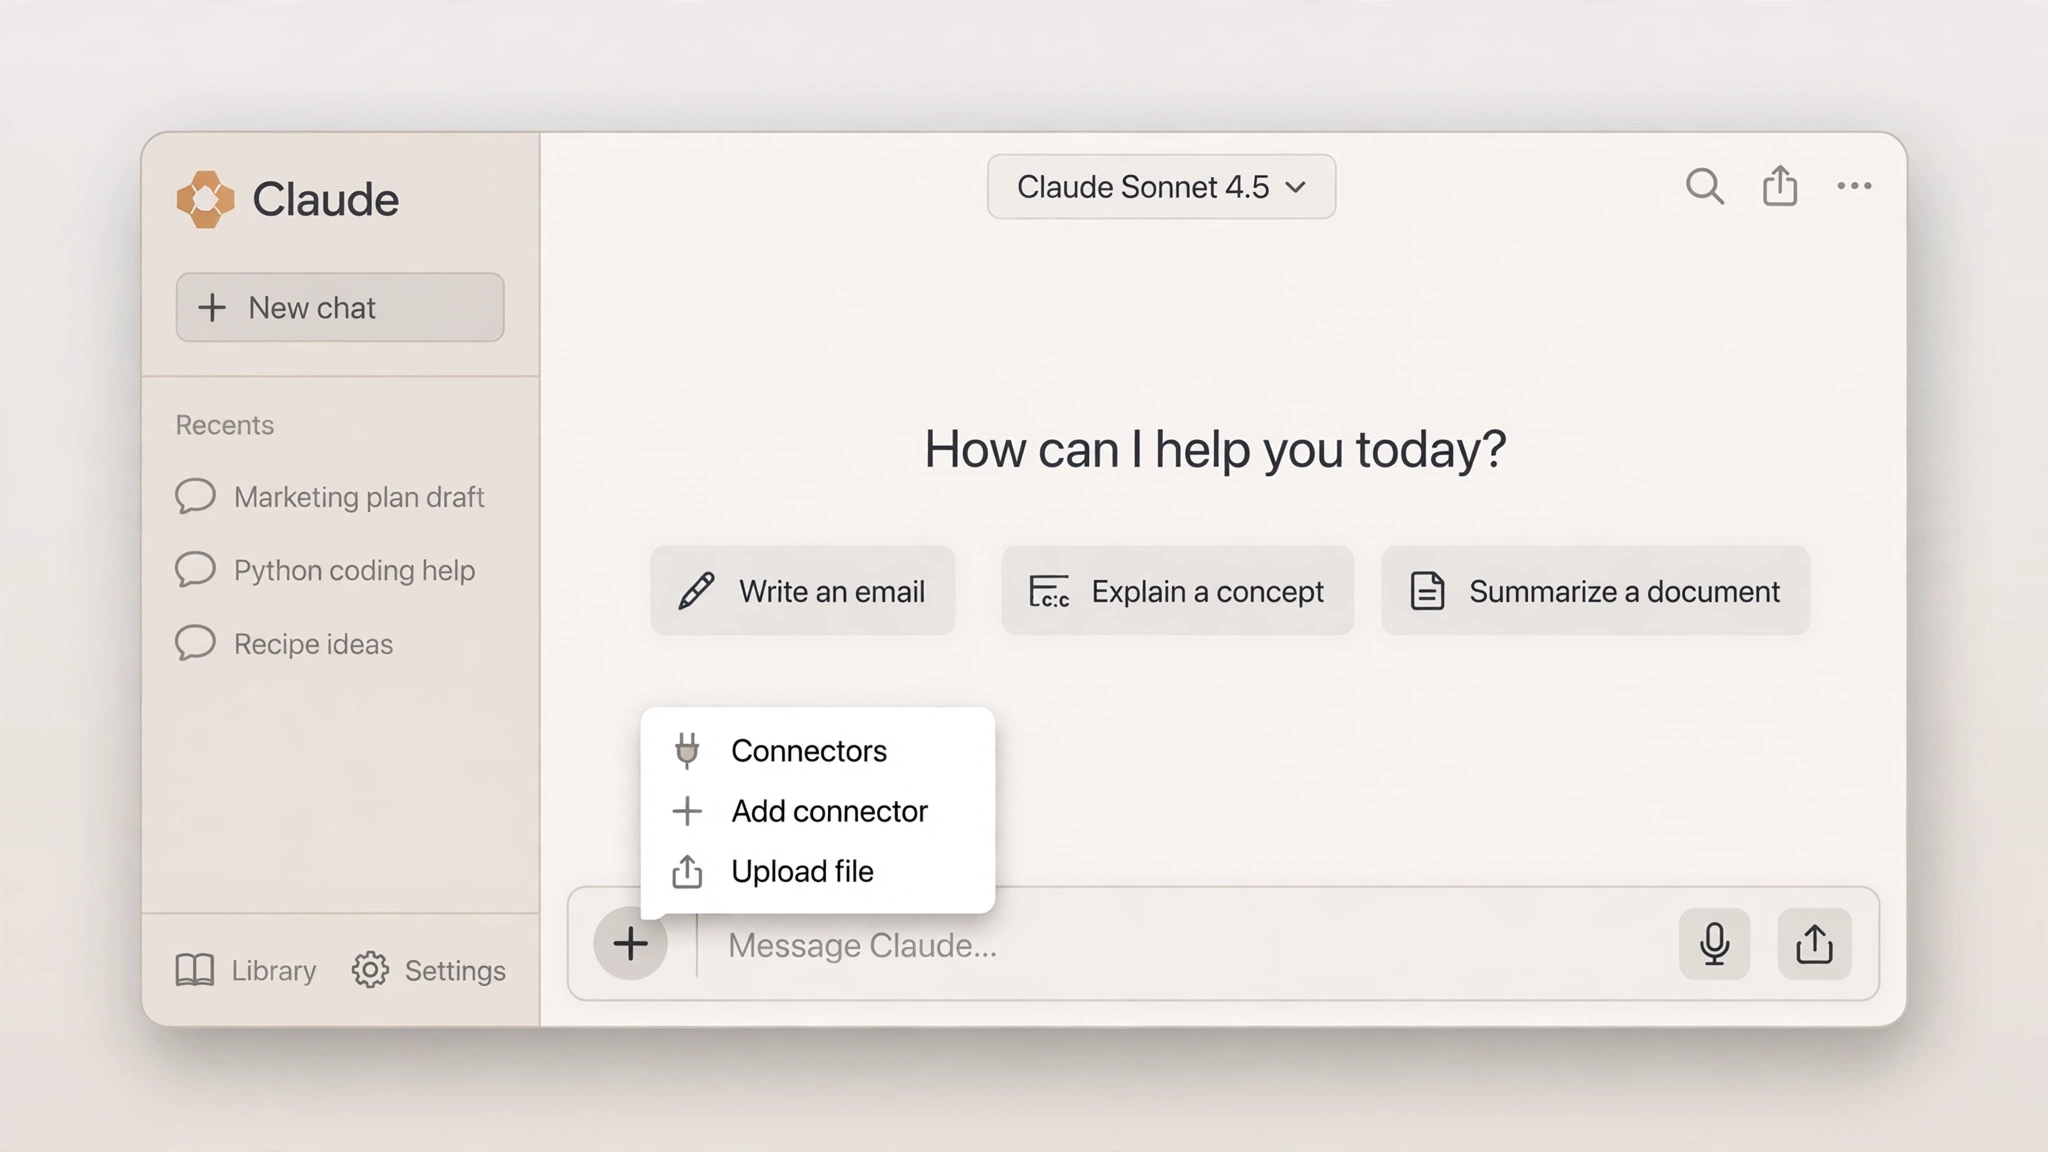
Start a new chat in Claude. Then click the plus (+) icon next to the message box, hover over Connectors, and choose Add connector. You can also get there from Settings, or from Customize > Connectors in Claude.
Step 2: Find Webflow and click Connect
In the connectors panel, click Browse connectors and search for Webflow. If it does not show under Featured, switch to All. Click the Webflow connector, then click Connect.

Step 3: Confirm the URL and authorize your site
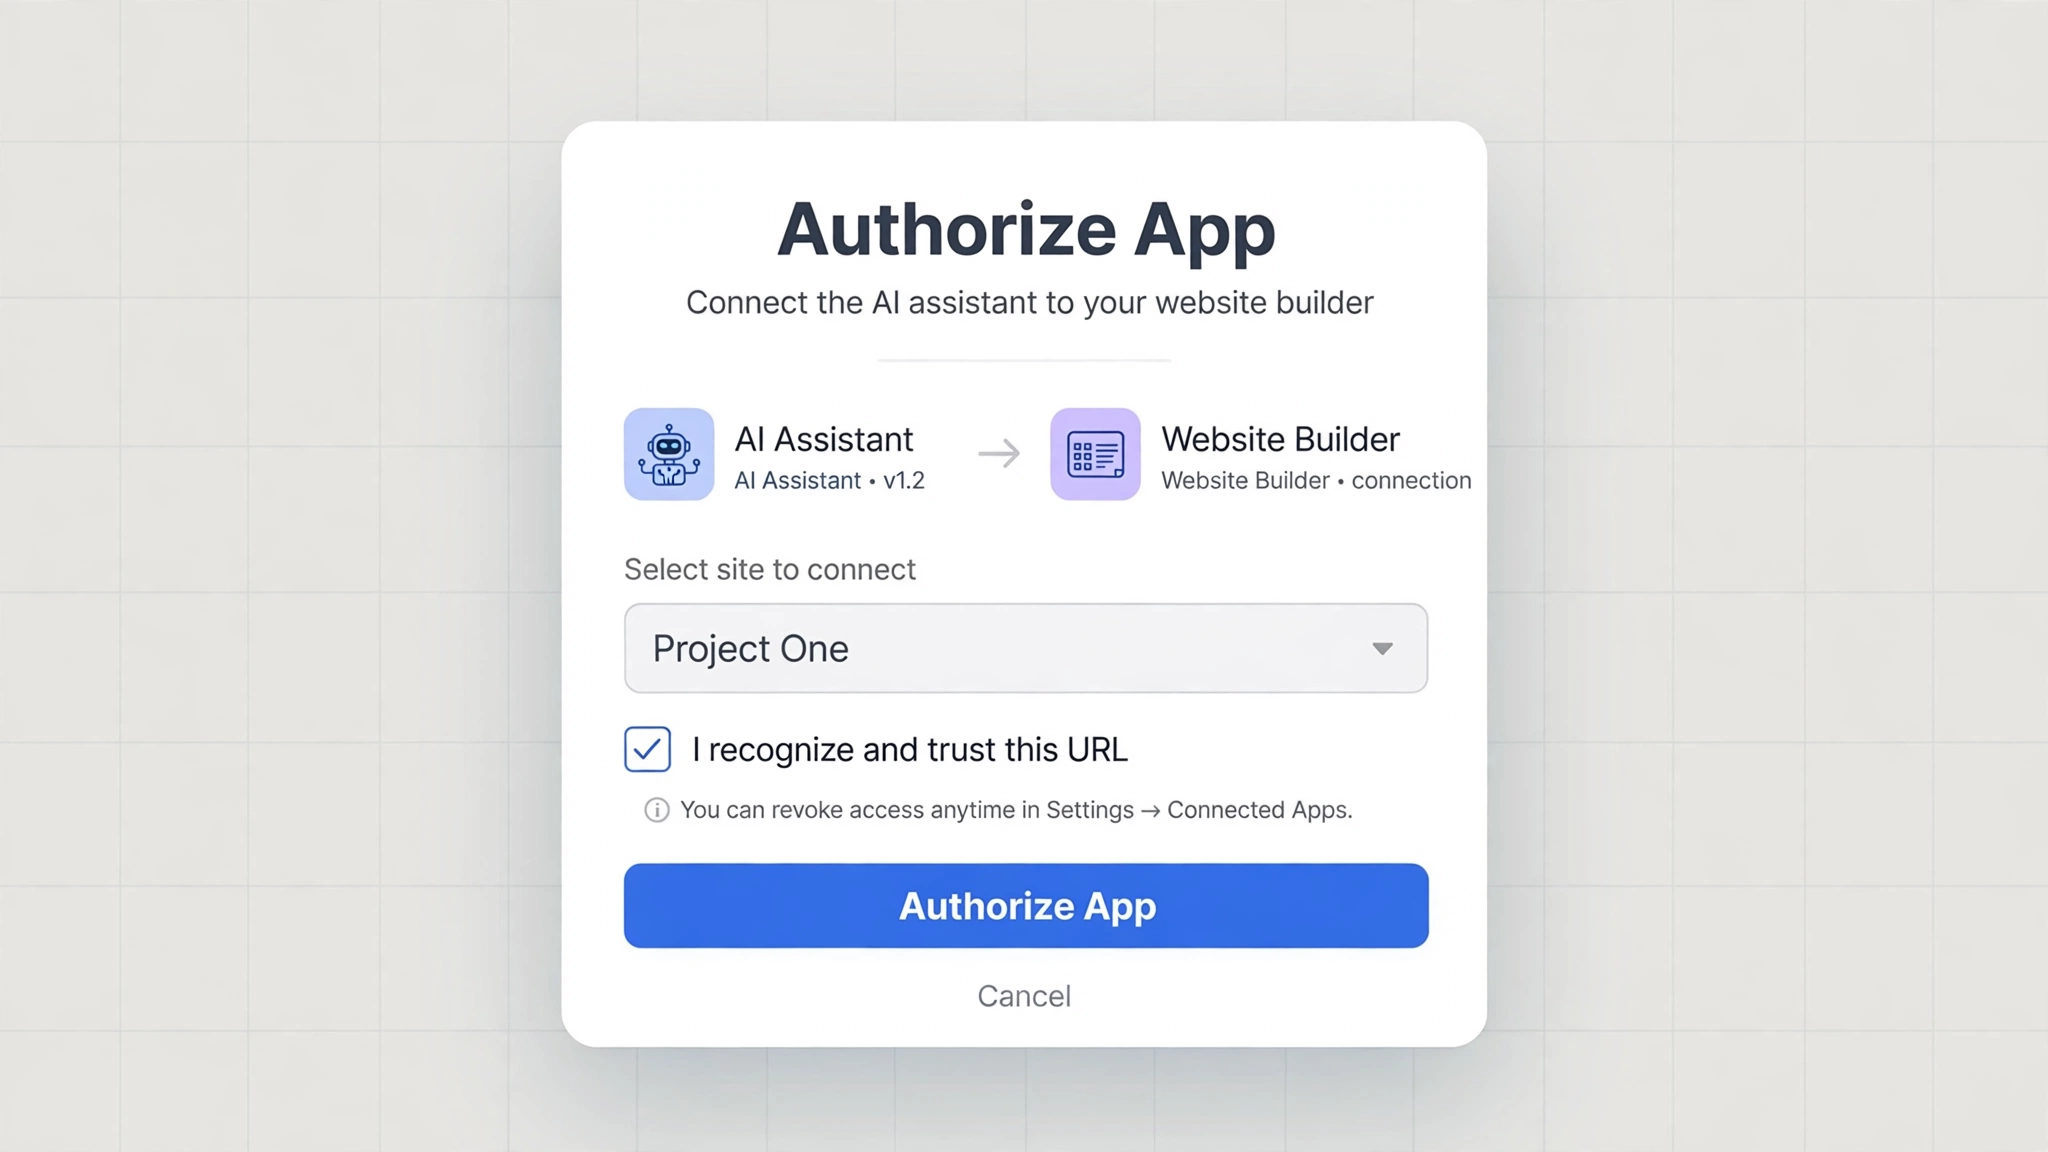
Claude will ask you to confirm the callback URL. Check that it is https://claude.ai/api/mcp/auth_callback and click Continue. You will be taken to Webflow to sign in if needed.
Next, choose which sites Claude can access. Pick only the sites you actually want it to work on — in the video, that is a blank test site called “Project One” — then click Authorize App. Each authorization covers one Workspace, so if your sites live in different Workspaces, you will authorize them separately.
When you return to Claude, you will see a “Connected to Webflow” message, and the Webflow connector will show as connected.
Step 4: Start a new chat and turn the Webflow connector on
Go back to Claude and start a new chat. Click the plus icon again and make sure the Webflow connector toggle is switched on for this chat, so Claude can reach your site while you talk to it.
Before prompting, it helps to check what Claude can see. Ask it to list your sites first — for example: “List my Webflow sites and the pages in Project One. Don’t change anything.” If it names your site correctly, the connection is working.
Step 5: Ask Claude to build a section — and tell it to put it in your site
Now ask Claude to build something. Keep the first request simple so you can see how it works. For example:
“Create a simple hero section for my Webflow site — just a headline, a short subtext, and one call-to-action button. Keep everything simple and don’t add anything fancy.”
Here is an important detail: on the first try, Claude may only write the HTML for the section instead of adding it to your Webflow site. That is normal. If that happens, send a follow-up prompt that tells it exactly where the section should go:
“Now inject this hero section into my Webflow site ‘Project One’, as the top section on the home page.”
Be specific about the site name and the page. Vague prompts get vague results — detailed prompts get a finished section.
Step 6: Approve the permissions and check Webflow
Claude will now call Webflow to add the section. By default, Claude asks you to approve each action it wants to take in your site. Click Always allow when it asks, so it does not keep stopping for the same permission. In the video, Claude asked four times before the section went in — approving each time finished the job.
Then refresh Webflow and open your site. You should see the new hero section on the page, exactly where you asked for it — headline, subtext, and button included.

Everything Claude adds is a normal Webflow element. You can click the heading and change the text, pick a different color, change the typography, or restyle the button — just like anything you built by hand.
What else can you do with Claude and Webflow?
Once the connector is set up, it is not only for hero sections. From a plain-language prompt, Claude can also:
- Build whole pages and sections — landing pages, pricing sections, FAQs, footers.
- Manage CMS content — add, update, or organize collection items in bulk.
- Edit styles and classes — change colors, fonts, spacing, and variables across the site.
- Run audits — ask it to check a page’s SEO, content, or usability and suggest fixes.
- Read your site data — ask about pages, collections, and even traffic data from Webflow Analyze.
Since the MCP 2.0 update, most of these tasks work without opening the Designer at all. You only need the Designer open (with the Bridge App) when Claude needs live visual context — for example, to look at the currently selected element or to work from what is visible on the canvas.
Things to know before you use it
- Free plans are enough. The connector works on every Webflow site plan, including the free Starter plan, and on Claude’s free plan. On the free Claude plan, you approve each action as Claude asks; paid plans can set automatic approval.
- Control the permissions. You can block or always allow specific actions under Customize > Connectors > Webflow in Claude. On a live site, keep approval on — automatic approval can make edits without asking you first.
- Only authorize what you need. Give Claude access to one site at a time, and use a test site first. Do not connect it to a client’s live site until you have tried it on your own project.
- Always check before publishing. Claude can make mistakes — a wrong class, a duplicated section, or text that does not fit your brand. Review every change in the Designer before you hit Publish in Webflow.
- Some things are still off-limits. Webflow Interactions (IX3) cannot be created or edited through the connector, and anyone with the Reviewer role cannot connect at all.
FAQs
Is connecting Claude to Webflow free?
Yes. The official Webflow connector works on the free plans of both Claude and Webflow, including Webflow’s free Starter site plan. You do not need a paid plan on either side to build sections with prompts.
Do I need Claude Pro to use the Webflow connector?
No. The connector is available to all Claude users, including free accounts. The main difference is that free users approve each action Claude takes, while paid plans can allow actions automatically.
Can Claude publish my Webflow site?
Claude builds and edits pages inside your site, but publishing stays with you. Review the changes in the Webflow Designer first, then publish from Webflow when you are happy with them.
Is it safe to connect Claude to my Webflow account?
The official connector signs in with OAuth — no API key is stored anywhere — and it respects your existing Webflow role permissions. Still, only authorize the sites Claude needs, and keep approval turned on for a live site.
Claude only gave me code instead of adding the section to Webflow. What do I do?
Ask it again, and name the site and page: “Inject this section into my Webflow site [site name], as the top section on the home page.” Then approve the permission prompts when they appear. The first prompt builds the section; the second one tells Claude where to put it.
Connect Webflow with other AI tools
Conclusion
Connecting Claude to Webflow takes about five minutes and turns website building into a conversation: describe the section you want, approve the permissions, and watch it appear in your Webflow site. Start with a simple section on a test site, get comfortable with the prompts, and then use it for real pages, CMS updates, and audits.
If you prefer a different AI for the same job, see our guide on how to connect ChatGPT with Webflow. And if you like connecting AI tools to the apps you already use, you will also like how to connect Gemini to Gmail and how to connect ChatGPT to Gmail.
Watch the video
Watch the full walkthrough above to see the setup, the prompts, and the hero section being added to Webflow step by step.


Pingback: How to Remove a Domain from Shopify (2026 Guide)
Pingback: How to Connect ChatGPT with Webflow (Step-by-Step Guide) - BuildNEarn
Pingback: How to Connect Claude AI to Hostinger Email (2026 Guide)