
Introduction
What if ChatGPT could read your inbox, write your replies and send emails for you — without you ever opening Gmail?
Once you connect ChatGPT to your Gmail account, that is exactly what it can do. You can ask it to find an email from a specific person, summarise a long thread, draft a professional reply, or send an email about your project requirements — all from inside a chat.
In this guide I will show you exactly how to connect ChatGPT to Gmail, step by step, and then how to use it to send your first email.
What you need before you start
- A paid ChatGPT plan. The Gmail connection is only available on Plus, Pro, Business and Enterprise plans. On a free account the Gmail app does not appear in the Plugins list at all — so if you cannot find it, that is why.
- A Google account — the one whose Gmail inbox you want ChatGPT to reach.
- ChatGPT open on the web or desktop app, signed in with your paid account.
Note: the connection is made through ChatGPT’s Plugins (also called Apps or Connectors in some versions). OpenAI has renamed this section more than once, so if your Settings shows “Apps” instead of “Plugins”, you are in the right place.
How to connect ChatGPT to Gmail
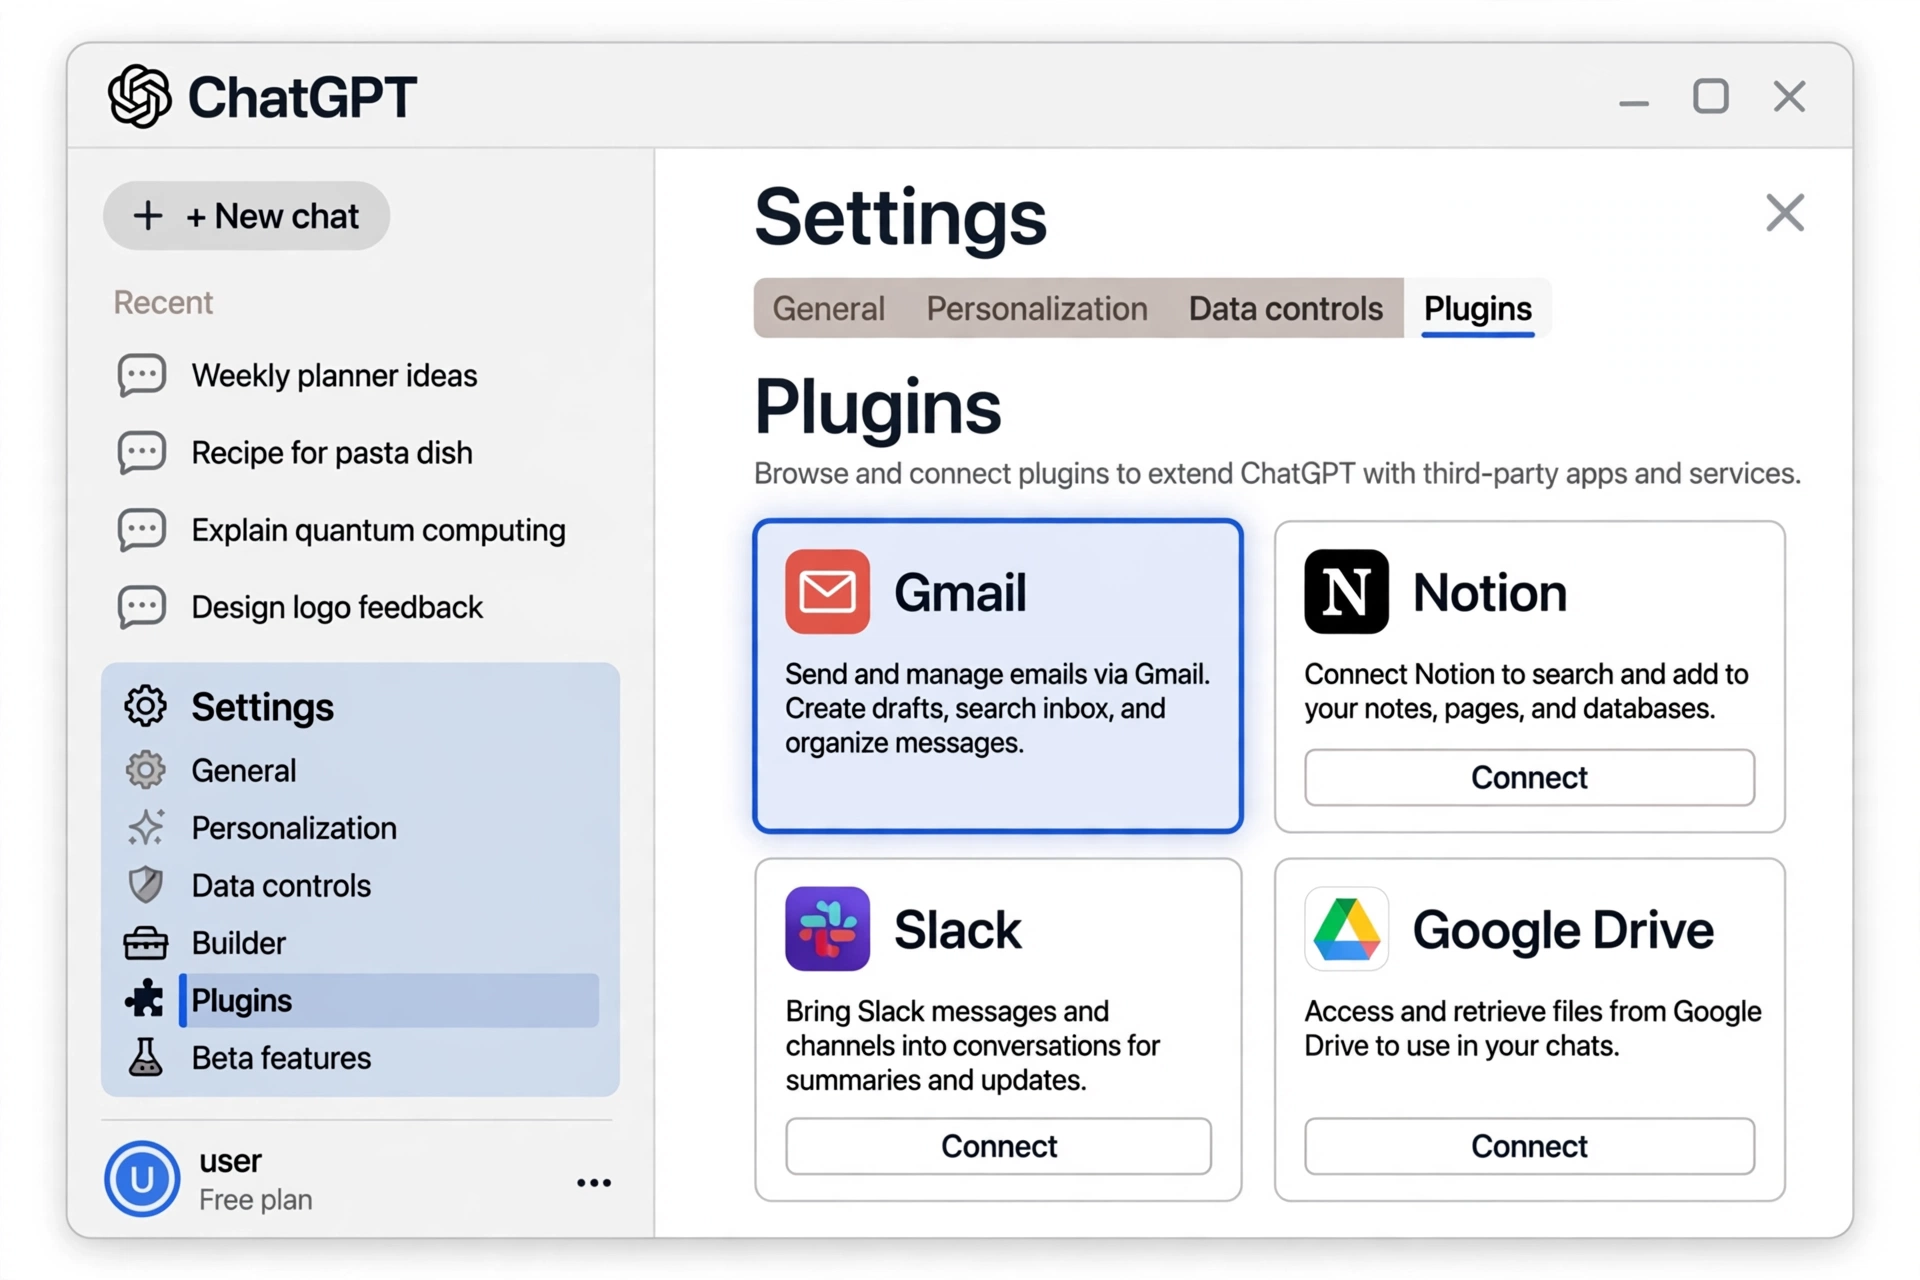
Step 1: Open ChatGPT Settings and go to Plugins
Open ChatGPT and click your profile icon, then open Settings. Go to Plugins (in some versions this is under “Apps” or “Connectors”).
Step 2: Find Gmail and click Connect
In the Plugins directory you will see the popular apps, including Gmail. If you do not see it, use the search box and type “Gmail”. Click the + icon (or Connect / Install) on the Gmail app.
Step 3: Choose which Google services to connect
ChatGPT will ask which Google services you want to enable. You can turn on Gmail, Google Drive, Google Contacts and Google Calendar — or turn off any service you do not want. You do not have to connect all of them; each one connects separately, so only enable the ones you actually need.
When you are happy with the selection, click Continue to Google.
Step 4: Sign in with Google and approve the permissions
Google’s own sign-in screen will appear. Sign in with the Google account whose inbox you want to connect, read the permissions Google lists, select all of them and click Continue.
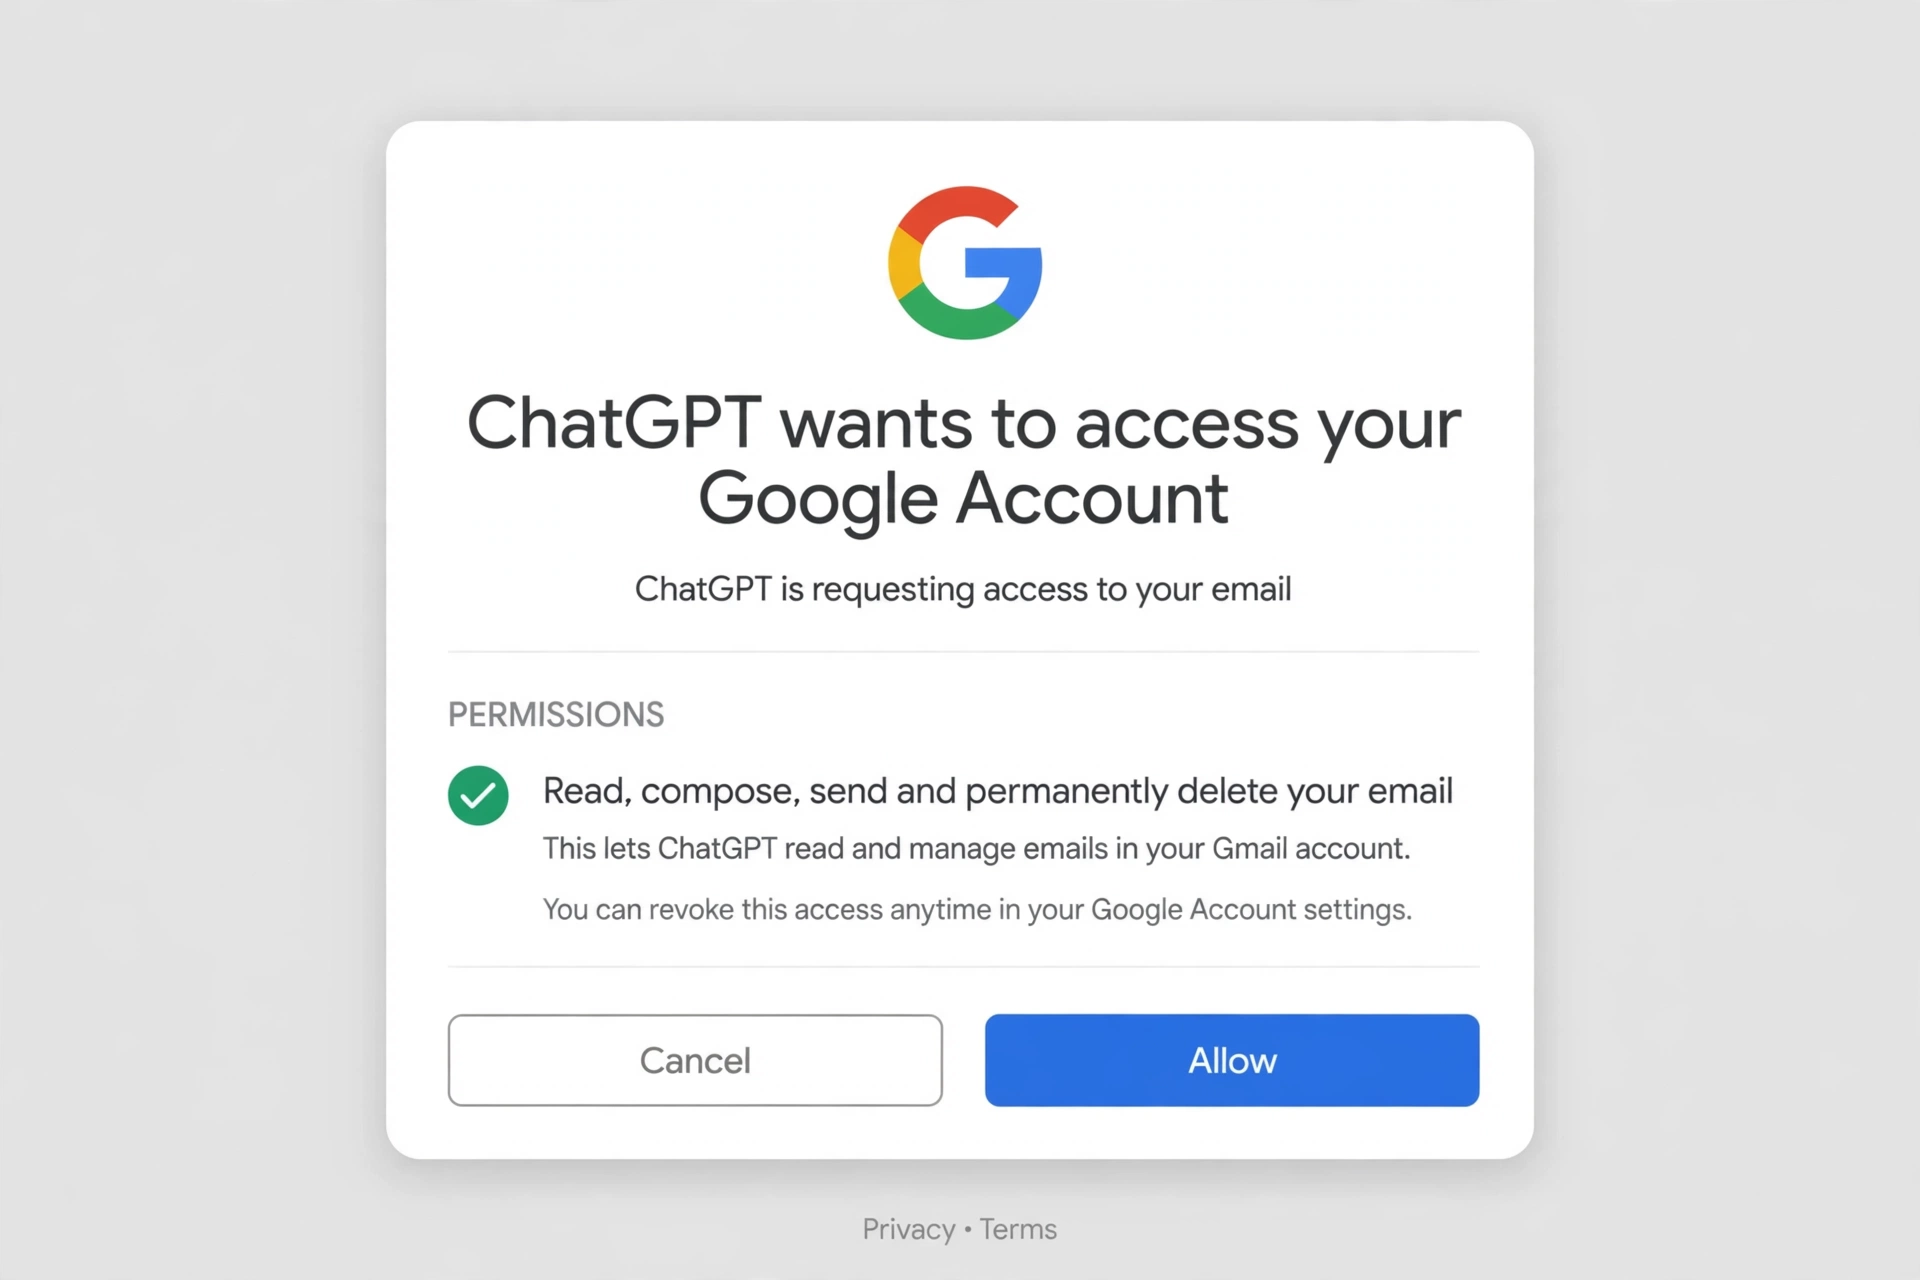
That installs the Gmail plugin, along with any other Google services you enabled. You can verify the connection in Settings > Plugins under your installed apps — Gmail should now show as connected.
How to use ChatGPT with Gmail
Step 1: Mention @Gmail in a new chat
Start a new chat in ChatGPT. Click the + icon in the message box, search for Gmail and select it — or simply type @Gmail in your message. This tells ChatGPT to use your connected Gmail account for this request.

Step 2: Ask ChatGPT to send an email
Now ask ChatGPT what you want it to do. Be specific: who the email is for, what it is about, and what you want it to say. For example, ask it to send a professional email requesting the key project requirements from a teammate.
ChatGPT will draft the email for you, with the recipient, the subject and the full message.
Step 3: Review the draft, then send it
Do not send it straight away. Read the draft first and ask ChatGPT to change anything you want — the tone, the details, or the length. When you are happy with it, click Send.
ChatGPT will send the email from your Gmail account.

Step 4: Check Sent in Gmail
Open Gmail and check your Sent folder to confirm the email went out. If the recipient does not see it, check their spam folder — in my test the email landed in spam, most likely because of the wording in it. In Gmail, open the message and click Report not spam and it will move into the inbox.
What else ChatGPT can do once it is connected
- Search and summarise your inbox — ask it to find the last email from a named person, or summarise a long thread you have not read yet.
- Draft replies — tell it what you want to say and it will write a professional reply you can review before sending.
- Compose emails from scratch — give it the key points and it will turn them into a full email.
- Unsubscribe you — if you no longer want emails from a sender, ask ChatGPT to unsubscribe them for you.
- Work with your other Google apps — if you also connected Calendar, Drive or Contacts, ChatGPT can check your schedule and files in the same conversation.
Things to know
- It is a paid feature. The Gmail connector is not available on the free ChatGPT plan. Plus is the usual entry point.
- It sends one email at a time, with your approval. ChatGPT drafts the message and you confirm it before anything goes out. It does not send emails in bulk.
- Your whole mailbox is in scope. The permission covers the entire Gmail account, not a single folder — so connect only the account you mean to share.
- OpenAI says it does not train its models on data from connected Google apps. When you disconnect, the indexed copy of your data is deleted within 30 days.
- You can connect more than one Gmail account — for example a personal and a work account — to the same ChatGPT account.
- Work or school accounts may need admin approval. If the Google sign-in fails with an authorization error, your Google Workspace administrator has not approved the ChatGPT app yet.
- ChatGPT can make mistakes, so always review a draft — the recipient, the subject and the wording — before you click Send.
FAQs
Do I need a paid ChatGPT account to connect it to Gmail?
Yes. The Gmail connector is available on Plus, Pro, Business and Enterprise plans. On the free plan the Gmail app does not appear in Plugins, so there is nothing to connect.
Can ChatGPT send emails by itself?
It can send an email from your Gmail account, but only after you approve it. You ask it to draft the message, review the draft, and then confirm — nothing is sent without you checking it first.
Can ChatGPT read all my emails?
Once connected, it can search and read across the mailbox you linked, when a conversation calls for it. It cannot reach any other account, and it has no access at all until you deliberately connect Gmail and approve Google’s permission screen.
Can I connect more than one Gmail account?
Yes. You can link more than one Google account to ChatGPT, for example a personal and a work inbox, and choose which one to use with @Gmail in each chat.
How do I disconnect Gmail from ChatGPT?
Go back to Settings > Plugins, find the Gmail app and select Disconnect. You can also remove ChatGPT’s access from your Google Account at myaccount.google.com/linkedapps.
Connect Gmail with other AI tools
- How to Connect Claude AI to Gmail and Send Emails for Free
- How to Connect Gemini to Gmail (2026) — Turn On Gemini in Gmail, Free
Conclusion
That is how you connect ChatGPT to Gmail: open ChatGPT Settings, go to Plugins, find Gmail, choose the Google services you want, sign in with Google and approve the permissions. After that, mention @Gmail in any chat and ask ChatGPT to read, draft or send your emails — just review every draft before you send it.
Try it with one email first — ask ChatGPT to draft it, check it, and send it — and you will see how much time it saves.
Also read: How to Connect Claude AI to Gmail and Send Emails for Free, How to Connect ChatGPT to Outlook and Send Emails Using AI for Free, and How to Connect Gemini to Gmail (2026) — Turn On Gemini in Gmail, Free

Pingback: How to Connect Claude AI to Gmail and Send Emails for Free - BuildNEarn
Pingback: How to Connect Gemini to Gmail (2026) — Free, Step by Step
Pingback: How to Connect ChatGPT to Outlook and Send Emails Using AI for Free - BuildNEarn