If you want to temporarily remove your Facebook Page without permanently deleting it, Facebook gives you the option to deactivate or unpublish it. Deactivating a Facebook Page is useful if you want to take a break, pause your business page, or hide the page from the public for a while.
In this guide, I’ll walk you through how to deactivate a Facebook Page from your Facebook profile.
Step 1: Log In to the Correct Facebook Page
First, log in to the Facebook profile that has access to the Page you want to deactivate. Make sure you switch into the specific Facebook Page before starting the process.
Step 2: Go to Settings and Privacy
Once you are logged in to the correct Page, click on the profile icon in the top corner of Facebook.
From the menu, select Settings & Privacy, then click on Settings.
Also read: How to Find Your Facebook Activity Log, Manage Reactions, Comments, and Watch History
Step 3: Find the Page Information Section
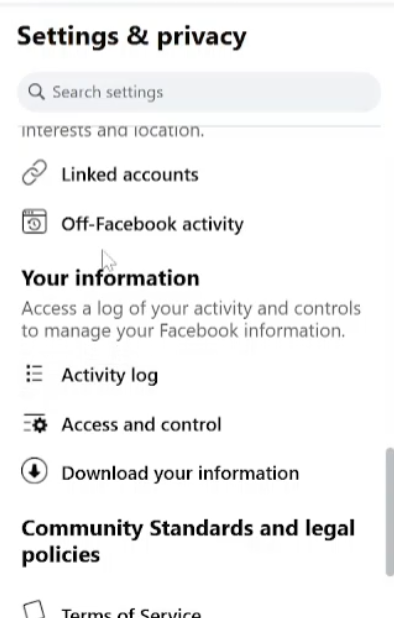
Inside the Settings menu, look at the sidebar and scroll down until you find the section related to your information.
From there, click on Access and Control.
Step 4: Choose the Deactivation Option
After opening Access and Control, Facebook will show you a few options. These may include:
- Deactivating the Page
- Unpublishing the Page
- Deleting the Page
The process is very similar for each option, but in this tutorial, we are focusing on how to deactivate a Facebook Page.
Select the Deactivate Page option and click Continue.
Get 20% discount on your hosting plan.
Step 5: Enter Your Facebook Password
Facebook will ask you to enter the password for your profile to confirm that you have permission to make changes to the Page.
Enter your password, then click Continue.
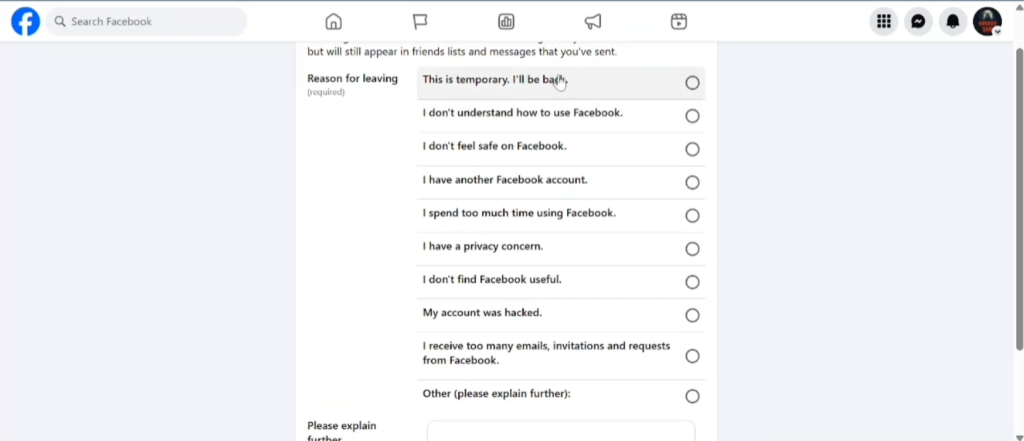
Step 6: Select a Reason for Deactivation
Next, Facebook will ask why you want to deactivate the Page. You can choose any reason that applies to you.
For example, you can select “This is temporary. I’ll be back.”
Facebook may suggest that you simply log out instead, but if you still want to deactivate the Page, cancel that suggestion and continue with the deactivation process.
Step 7: Confirm Deactivation
Click Deactivate, then confirm again by selecting Deactivate Now.
Wait a few moments while Facebook processes the request. Once the page refreshes, you may be redirected back to your main Facebook profile.
At this point, your Facebook Page should be deactivated.
Final Thoughts
That’s how you can deactivate a Facebook Page from your Facebook profile. This is a helpful option if you want to temporarily hide your Page without permanently deleting it.
If you found this guide helpful, make sure to subscribe to the channel. If you are watching on Facebook or TikTok, be sure to follow the profile for more helpful tutorials.